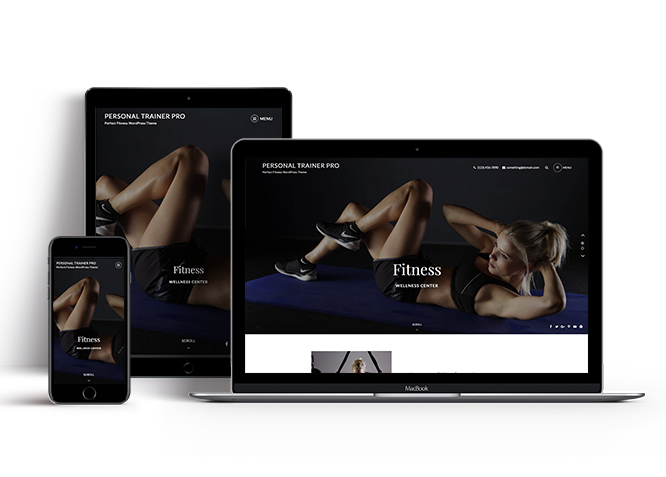
Personal Trainer Pro is a powerful and impressive, reliable and robust, user-friendly and highly responsive multipurpose fitness WordPress theme. Personal Trainer Pro is a capable framework for crafting impressive modern websites of any kind. With this new multipurpose fitness WordPress theme, you can build awesome fitness center websites in just a matter of minutes. Personal Trainer Pro provides you with incredible features—such as, custom header image, featured slider, featured content, portfolio, contact info on the header, services, professionals, reservation, testimonials, ecommerce, and more—that are extremely crucial to make your website of any kind, a hit among others. From gyms to fitness consultants, from cross fitter websites to fitness magazines, Personal Trainer Pro’s clean design, and power-packed features will definitely ensure your reach is broader than you ever thought. This theme is translation ready. For more details check out the Theme Instructions.

Features
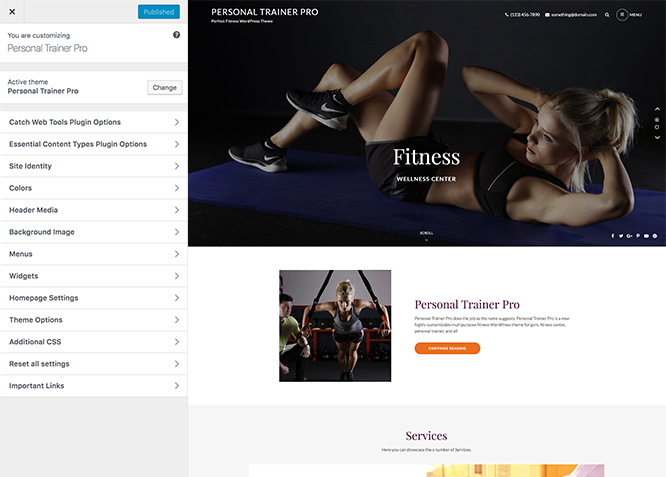
Theme Options
The most powerful feature of Catch Themes is its Theme Options which will allow you to easily customize your website with clicks. So, now you no longer need to be a designer or a programmer to build customized websites. Theme Options allow you to toggle on and off features, adjust layouts, change colors, fonts, logo, favicon, background, add social links and custom CSS.
Responsive Design
One of the key features of our themes is that your website will magically respond and adapt to different screen sizes delivering an optimized design for iPhones, iPads, and other mobile devices. No longer will you need to zoom and scroll around when browsing on your mobile phone.
Featured Post Slider
Featured Slider is an option that is helpful to highlight noteworthy posts on your site. You can have columns of content as well as selected images set on your post slider. The fun part is, you get to decide for how long a post stays on your page before something else comes up on the slider. How will you make that happen? By exercising your control over different slide effects and their timing!
Webmaster Tools
Webmaster Tools option helps you to minutely manage your site. Firstly, it helps to verify the site in Google, Yahoo and Bing. Additionally, whether it is something like site optimization, keeping track of your site traffic or overseeing and altering your display settings, you can call the shots for you site through Webmaster tools. These tools also allow you to add to your site Header and Footer Scripts like Google Analytics, Site Stats, Facebook, twitter and much more.
Custom Widgets
Our themes have widgetized areas commonly known as sidebar. Here, you can add up various widgets and customize their display to satisfy your unique needs.
Incredible Support
We have a great line of support team and support documentation. You do not need to worry about how to use the themes we provide, just refer to our Tech Support segment. Further, if you need to do advanced customization to your website, you can always hire our theme customizer!
Featured Image Slider
Featured Image Slider allows you to not only add images, but also write a description for them. If a descriptive caption would not suffice, you also have the option of providing a clickable link. This way, as per your unique needs, should you require, you can easily add a URL to your content.
Featured Page Slider
Featured Page Slider is an option that is helpful to highlight noteworthy pages on your site. You can have columns of content as well as selected images set on your page slider. The fun part is, you get to decide for how long a page stays on your page before something else comes up on the slider. How will you make that happen? By exercising your control over different slide effects and their timing!
Featured Content
Featured Content allows you to highlight your recent & popular posts on your website. It can either be displayed on Homepage or the entire site. You can add your title and sub-title for featured content, select the number of featured content, display Meta, select multiple categories, and enjoy displaying your featured & recent posts.
Services
Every website owner wants the world to know about the services they provide. It allows you to place the services you provide for your customers on the spotlight. Choose to display the services in 2 to 4 columns. Display your services on the homepage only or on the entire website.
Custom Fonts
You can choose different types of stylish and engaging fonts for your Site Title, Tagline, Headline Tags, Content Title, and Content Body. Choose the font that suits best for your website from the font family options and makes your website more striking.
Hero Content
You can now display the best assets of your website with the Hero Content feature. The feature allows you to highlight the most important content in a fashion that is easily attention-grabbing. You can enable the hero content either on Homepage or the entire site. Hero Content - the easiest way to display your strengths.
WordPress Standard Codes
Our code is secure and optimized. We do proper data validation and sanitization and follow core theme guidelines. Our developers are active contributors to WordPress theme review and WordPress core. Our themes will always be updated as things change in WordPress.
Testimonials
People are always curious about what your goods and services are really like. Since customer testimonials are candid and not by the company promoting the product, they assist in building trust. You can display testimonials on Homepage, the entire site or disable it completely.
Footer Editor
Footer Editor Options enables you to edit the content of the footer easily. You can either add HTML, plain text, or custom shortcodes which will be inserted into your theme automatically. You can use shortcodes like [the-year], [site-link] and [privacy-policy-link] for the current year, site link and privacy policy link respectively.
More Features
- Theme Options
- Responsive Design
- Featured Slider
- Webmaster Tools
- Alternative Styles
- Page Templates
- Color Options
- Featured Thumbnail
- Threaded Comments
- Dropdown Menu
- Excerpt Length
- Feed Redirect
- Gravatar Ready
- Localized for translations
- Custom Header / Logo
- Custom Favicon
- Custom Menu
- Custom Footer
- Custom Background
- Custom Layout
- Custom Widget
- Custom Fonts
- Custom Homepage
- Custom CSS
- Support
- WooCommerce Ready
- WPML Ready
- Hero Content
- Testimonials
- Services
- Header Video
- Featured Content
- WordPress Standard Codes
- Our Professionals
- Reservation
Free Vs Pro (Premium)
| Free | Features | Pro (Premium) |
|---|---|---|
| Responsive Design | ||
| Super Easy Setup | ||
| Color Options for various sections | ||
| Header Media | ||
| Primary Menu | ||
| Social on Primary Menu with Modern style and mobile menu | ||
| Social on Slider/Header Image | ||
| Social on Footer | ||
| Breadcrumb | ||
| Comment Options | ||
| Contact Info | ||
| Excerpt Options | ||
| Featured content: Post | ||
| Featured content: Page | ||
| Featured content: Category | ||
| Featured content: Custom | ||
| Featured content: Custom Post Types | ||
| Featured Slider: Post | ||
| Featured Slider: Page | ||
| Featured Slider: Category | ||
| Featured Slider: Custom | ||
| Font Family Options | ||
| Footer Editor Options | ||
| Hero Content:Post | ||
| Hero Content: Page | ||
| Hero Content:Category | ||
| Hero Content:Custom | ||
| Site Layout: Boxed/Fluid | ||
| Default Layout: Right Sidebar ( Content, Primary Sidebar ) | ||
| Default Layout: Left Sidebar ( Primary Sidebar, Content ) | ||
| Default Layout: No Sidebar | ||
| Default Layout: No Sidebar: Full Width | ||
| Homepage/Archive Layout: Right Sidebar | ||
| Homepage/Archive Layout: Left Sidebar(Primary Sidebar, Content) | ||
| Homepage/Archive Layout:No Sidebar | ||
| Homepage/Archive Layout:Full Width | ||
| WooCommerce Layout | ||
| Menu Options:Classic and Modern | ||
| Pagination Options | ||
| Professionlas: Post | ||
| Professionals: Page | ||
| Professionals: Category | ||
| Professionals: Custom | ||
| Reservation: Post, Page and Custom | ||
| Scroll Up Options | ||
| Search Options | ||
| Service: Post | ||
| Service: Page | ||
| Service: Category | ||
| Service: Custom | ||
| Service: Custom Post Type | ||
| Testimonials: Post | ||
| Testimonials: Page | ||
| Testimonials: Category | ||
| Testimonials: Custom | ||
| Testimonials: Custom Post Type | ||
| Update Notifier | ||
| WooCommerce Options | ||
| WooCommerce Ready | ||
| WPML Ready |
Theme Instructions
#How to install theme?
Go to this link
#How to update theme to the latest version?
Go to this link
#How to add Demo Content?
Go to this link
#Download Demo content files?
Click on the button below to download the demo zip files which contain, customizer.dat (Customizer Settings File), demo-content.xml (Content File), and widgets.wie (Widget Settings File) files.
#Always Set Featured Images
Custom Header
Width: 1920px
Height: 700px
Post Thumbnail
Width: 480px
Height: 364px
Slider Image:
Width: 1920px
Height: 1080px
Hero Content:
Width: 480px
Height: 480px
Testimonial:
Width: 225px
Height: 225px
Service:
Width: 760px
Height: 760px
#How to add Featured Image in Post/Page?
Go to this link.
#Regenerate Thumbnails
For regenerate thumbnails got to this link
Customizer (Theme Options) #
You can customize this theme using cool additional features through Customizer at “Appearance => Customize” from your WordPress Dashboard.
#How to add Logo?
Go to this link
#How to enable/disable Site Title and Tagline
Go to this link
#How to add Site Icon (Favicon/Web Clip Icon)?
Go to this link
#Color
Go to this link
#How to add Header Video?
Go to this link
#How to add Header Image?
Go to this link
#Menus
Personal Trainer Pro offers exciting Menu Options! This theme supports and recommends using “Custom Menus”. You can create Custom Menu through “Appearance => Menus” from your WordPress Dashboard.
Select Menu Locations
You can assign your custom menu in 4 different locations. You assign it either from “Appearance => Customize => Menus => Manage Location” or from “Appearance => Menus => Manage Location”
Select your Custom Menu as Primary Menu to display it as the Main Menu, which will replace the default Page Menu
Social on Primary Menu with Modern style and Mobile menu
Select your menu as Social on Slider/Header Image
Select your custom menu as Footer Menu to display Menu in Footer Area
#Comment Options
Go to this link
#Contact Info
Personal Trainer Pro allows you to add your personal information like phone, email, phone
- Go to “Appearance => Customize => Theme Options => Contact Info”
- You can change Phone, Email and Address
- You can further change option to enable/disable these information on header and footer as per your need
- Finally, click on “Save & Publish”
#How to Change the Excerpt Length and Read More Text?
Go to this link
#Featured Content
Personal Trainer Pro supports 5 featured content types to choose from: 1. Post, 2. Page, 3. Category and 4. Image. 5.Custom Post Type(requires Essential Content Type Plugin ). For Featured Content Options, go to “Appearance => Customize => Theme Options => Featured Content”
Go to this link
#Featured Slider
Personal Trainer Pro supports 4 featured slider types they are: 1. Post , 2. Page, 3. Category and 4. Image. For Featured Slider Options, go to “Appearance => Customize => Theme Options =>Featured Slider”.
Go to this link
#How to select different font for different sections?
Go to this link
#How to add Contact Information above Footer?
- Go to “Appearance => Customize => Theme Options => Footer Contact”
- First enable Footer Contact by clicking option under “Enable on”, choose Entire Site or Homepage/Frontpage
- Then choose your Type as Post, Page or Custom
- If you choose “Post” as Footer Contact then choose the Posts you want to display as footer contact
- If you choose “Page” as Footer Contact then choose the Page you want to display as footer contact
- If you choose “Custom” as Footer Contact then add Title, Description and Custom Content Code as per your need
- Finally, click on “Save & Publish”
#How to edit Footer Content?
Go to this link
Note: To reset Footer Content check option “Check to reset Footer Content”
#How to enable/disable search in header top?
- Go to “Appearance => Customize => Theme Options => Header Top”
- Then, click on disable search to disable header top
- Finally, click on “Save & Publish”
#Hero Content
Personal Trainer Pro supports 4 Hero Content types to choose from:1. Post , 2. Page, 3. Category and 4. Image. For Hero Content Options, go to “Appearance => Customize => Theme Options => Hero Content Options”.
Go to this link
#How to Set Certain Categories to Display in Homepage/Frontpage?
Go to this link
#Layout Options
Personal Trainer Pro has 2 Site Layout, 4 Default Layout, 4 Homepage/Archive Layout, 4 Featured Image and 4 Woocommerce Layout options image layout to choose from “Appearance => Customize => Theme Options => Layout Options”
Site Layout
Once you are in Layout Options, you can Check the option below “Site Layout” which will set your site layout.
Default Layout
Once you are in Layout Options, you can Check the box below “Default Layout Options” which will set our site layout. Further, you have the choice of selecting custom layout for individual pages and posts through “Personal Trainer Options => Layout Options”, which you shall find below individual posts and pages, when you click on them for adding/editing
Homepage/Archive Layout
Once you are in Layout Options, you can Check the box below “Homepage/Archive Layout” which will set our layout for Homepage/Archive Page. Further, you have the choice of selecting custom layout for individual pages and posts through “Personal Trainer Options => Layout Options”, which you shall find below individual posts and pages, when you click on them for adding/editing
Single Page/Post Image Layout
Once you are in Layout Options, you can Check the box below “Single Page/Post Image Layout” which will set our posts/page image layout. Further, you have the choice of selecting Single Page/Post Image Layout for individual pages and posts through “higher-education Options => Single Page/Post Image Layout”, which you shall find below individual posts and pages, when you click on them for adding/editing.
WooCommerce Layout
Select layout for your WooCommerce pages. Option to choose from 4 Layout Options: i. Left Sidebar(Primary Sidebar,Content), ii. No Sidebar, iii. No Sidebar:Full Width and iv. Right Sidebar(Content,Primary Sidebar)
#How to choose different menu style?
- Go to Appearance => Customize => Theme Options => Menu Style
- Under “Menu Style”, choose Modern or Classic style as per your need
- Finally, click on “Save & Publish”
#How to change Pagination Options?
Go to this link
#Professionals
Go to this link
Reservation #
Personal Trainer Pro supports 3 Reservation types to choose from: 1. Post , 2. Page and 3. Custom. If you use Type as custom you can add custom shortcodes form Cotact form 7 or from Jetpack,this form can be used by your visitors to reserve their seat at your fitness center. You can display the reservation form either on the Homepage/Frontpage or on the entire website. For Reservation Options, go to “Appearance => Customize => Theme Options => Reservation”.
Go to this link
#How to enable/disable Scrollup feature?
Go to this link
#How to change default text in search box?
Go to this link
Services #
Personal Trainer Pro supports 5 Services types to choose from: 1. Post , 2. Page, 3. Image, 4. Category and 5. Custom Post Type.
Go to this link
#Testimonials
Personal Trainer Pro supports 5 Testimonial types to choose from: 1. Post , 2. Page, 3. Image, 4. Category and 5. Custom Post Type.
Go to this link
#How to enable/disable update notifications?
Go to this link
#How to enable/disable Zoom, Lightbox and Slider effects for WooCommerce Product Gallery? #
Go to this link
#Content Types
If you want content type option in your theme you can use our free plugin Essential Content Type. The details are listed below:
Essential Content Type #
You can install our free plugin Essential Content Type from this link and follow the steps provided by the link.
#How to use Featured Content using Custom Post Type?
Go to this link
#How to add Service in Homepage/Frontpage using Essential Content Type?
Go to this link
#How to add Testimonials in Homepage/Frontpage using Essential Content Type?
Go to this link
#Widget Area (Sidebar)
Personal Traine Pro currently has 15 widgetized (Sidebar) areas thay are: 1. Sidebar, 2. Footer One, 3. Footer Two, 4. Footer Three, 5. Footer Four, 6. WooCommerce Sidebar, 7. 404 Page Not Found Content, 8. Optional Homepage Sidebar, 9. Optional Archive Sidebar, 10. Optional Page Sidebar, 11. Optional Post Sidebar, 12. Optional Sidebar One, 13. Optional Sidebar Two, 14. Optional Sidebar Three and 15. About Page Template Widget Area. Go to “Appearance => Widgets” or “Appearance => Customize => Widgets” in WordPress.
#Widgets
Personal Trainer Pro has 2 Widgets to choose from. They are: 1. CT: History Widgets and 2. CT: Social Icons. You can add widget in widget area as per your need.
#How to add Widgets in widget area?
You can add widgets to your widget area from two location
Go to this link for more detail.
#How to add “Social Icon” in widget area(CT:Social Icon)?
This widget is used to add social icons as a widget.
- Add CT:Social Icon to desired widget area. More Info
- Add “Title” under the respective field.
- Finally, click on “Save & Publish”
#Additional CSS
You can add your custom CSS that will overwrite the theme CSS for further design customization through “Appearance => Customize => Additional CSS”, in your WordPress Dashboard.
Note: If you are doing heavy customization and adding lot of custom css then we recommended to build Child Theme and add it in your child theme style.css file. Read More about child theme…
#Webmaster Tools
Go to this link for more detail
#Translating Your Theme with WPML
Go to this link for more detail
Recommended Plugins
* Catch Web Tools for Webmaster Tools
* To Top
* Catch IDs
* Essential Content Type
* Contact Form 7 for Contact Form
* WooCommerce for E-commerce
* WPML for multi-language
* WP-PageNavi for Numeric Pagination
* Regenerate Thumbnails to for Regenerating Thumbnails
* Jetpack for Infinite Scroll, Gallery, Stats, Titled Gallery, Image CDN and many more
Change Log
2.5.2 (Released: June 16, 2026)
- Updated: WordPress 7.0 ready
2.5.1 (Released: December 16, 2025)
- Bug Fixed: Deprecated Function WP_Dependencies-add_data() warning after WordPress update 6.9
- Updated: WordPress 6.9 ready
2.5 (Released: June 01, 2025)
- Added: Bluesky, Tiktok, X.com, Feed and Phone icon
- Bug Fixed: Padding-bottom on the inner page wrapper was not being applied due to the use of the float property
- Bug Fixed: Recent posts pattern huge margin gap between post content wrap and more posts button
- Bug Fixed: Height of input fields increased
- Bug Fixed: Width of post thumbnail set to full width of wrapper
- Bug Fixed: Optimized Google Map height for improved user experience on smaller devices
- Updated: About admin CSS for changelog display
- Updated: Font Awesome 6.7.2
- Updated: WordPress 6.8 ready
2.4.2 (Released: February 26, 2024)
- Bug Fixed: Theme updater deprecation notice in PHP 8.1
- Removed: Depreciated Instagram Feed Plugin recommendation
- Updated: WordPress 6.4 ready
2.4.1 (Released: August 21, 2022)
- Bug Fixed: Category slider default order issue
- Updated: Google Font hosted locally (https://make.wordpress.org/themes/2022/06/18/complying-with-gdpr-when-using-google-fonts/)
2.4 (Released: February 16, 2022)
- Optimized: Compress screenshot image
- Updated: WordPress 5.9 ready
2.3 (Released: November 10, 2021)
- Bug Fixed: Multi flex-height, changed to flex-height and flex-width
- Bug Fixed: Removed extra ; from header-background-color.php file
2.2 (Released: May 23, 2020)
- Bug Fixed: content.php heading condition
- Updated: readme.txt and style.css as per the new requirement
2.1.4 (Released: February 24, 2020)
- Bug Fixed: HTML issue in searchform.php
- Updated: Updater support for child theme
2.1.3 (Released: January 29, 2020)
- Bug Fixed: Typo issue
- Bug Fixed: h1 tag issue
- Bug Fixed: Breadcrumb issue when there are no categories
2.1.2 (Released: December 18, 2019)
- Bug Fixed: Gradient Base Background Color issue
- Bug Fixed: Gradient Secondary Background Color issue
- Update: Theme Update Message
2.1.1 (Released: December 10, 2019)
- Bug Fixed: Multi Category Sanitization issue
- Added: Portfolio Section
2.1 (Released: October 22, 2019)
- Added: About page
- Added: Automatic Update using license key
2.0.2 (Released: June 06, 2019)
- Bug Fixed: Featured Content Layout Option Issue
2.0.1 (Released: April 29, 2019)
- Added: Support for wp_body_open action
- Bug Fixed: Color Scheme issue fixed
2.0 (Released: January 23, 2019)
- Added: Theme support for block styles
- Added: Theme support for full and wide align images
- Added: Theme support for for editor styles
- Added: Theme support for responsive embeds
- Added: Theme support for custom editor font sizes
- Added: Theme support for custom color scheme
- Bug Fixed: Header media pause/play icon
- Bug Fixed: Added Content Filter to image/custom sections content that takes html
- Bug Fixed: Testimonial Typo corrected
- Updated: Metabox UI
- Updated: Readme file as per new requirement
- Updated: CSS optimized
- Updated: Content delivered through the_content filter
- Updated: Migration Script from free to pro
- Updated: Label changed from Image type to Custom
1.3.1 (Released: August 01, 2018)
- Bug Fixed: Free to pro options migration script
1.3 (Released: July 05, 2018)
- Added: Header Image Support for Testimonials, Portfolio, Services and Featured Content via Essential Content Types
- Added: Core Privacy Policy link support in footer
- Bug fixed: Footer Contact section issue fixed
- Replaced class_exists( 'woocommerce' ) with class_exists( 'WooCommerce' ) as WooCommerce update caused issues
1.2.1 (Released: May 22, 2018)
- Bug fixed: Reservation section form issue fixed (Reported by donlk)
1.2 (Released: May 08, 2018)
- Added: Editor style
1.1 (Released: March 22, 2018)
- Bug Fixed: Added screen reader texts for posted on and author in index page meta
- Bug Fixed: Design issue with Catch Infinite Scroll plugin
- Bug Fixed: Featured content description text change
- Bug Fixed: Missing entry container div closing in Page/Post services
- Bug Fixed: Missing post thumbnail check on content.php
- Bug Fixed: Testimonials check to move above content text changed
1.0 (Released: December 11, 2018)
- Initial release
Satisfaction Guarantee
We make sure our customers are fully satisfied with our WordPress themes and meet their expectations. If you are not satisfied with your purchase, you are entitled to our 30-Day 100% Money Back Guarantee. No risks, Buy with Confidence!