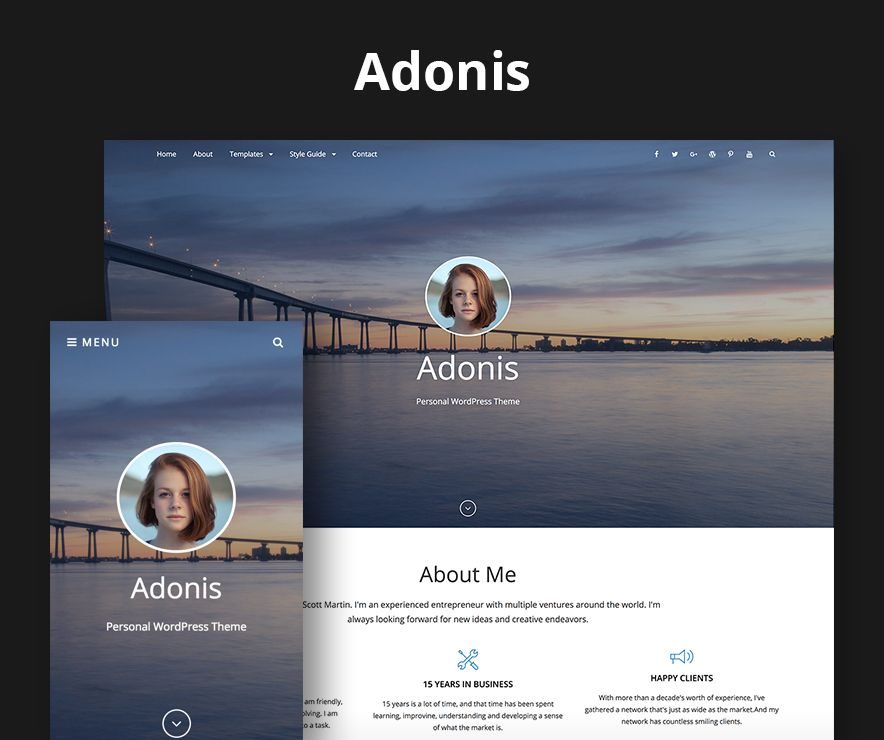
Adonis – A free Personal WordPress theme for professionals is simple, clean and user-friendly that will always put everything you have to offer in the forefront. Adonis theme has been specially crafted for the professionals to let the world know about them at large. It mainly focuses on creating an elegant personal website for the professionals in only a matter of times. Adonis is a minimalist yet powerful WordPress theme for professionals. It is based on responsive design, allowing your website to look beautiful on any device, regardless of the screen size. Adonis comes with a plethora of awesome features – such as, site identity, header media, header image, background image, custom menu, breadcrumb, excerpt, featured content, featured slider, logo slider, hero content, layout options, pagination options, portfolio, testimonials, services, testimonials, stats, and many more—that are extremely crucial for any professional to showcase their work. The theme is translation-ready.
Check out Support Forum at https://catchthemes.com/support-forum/forum/adonis-free/ and Demo at https://catchthemes.com/demo/adonis/
Features in “Adonis” Free Theme:
- Responsive Design
- Site Identity: Option to add/edit Custom Logo, Move Site Title and tagline before logo, enable/disable Site title and tagline and option to add Site Icon(FavIcon/Webclip Icon)
- Colors: Option to change header text color and background color
- Header Media: Option to add Custom Header Video or embed video from Youtube, display/hide Header Image
- Header Image: Option to change Custom Header, Enable/Disable Featured Header Image, edit Page/Post Featured Image Size, Edit: Title, Content and Button Text, Add/Edit Button Link and open link in new window/tab
- Background Image: Option to choose Background Images
- Menu: Option to use Primary Menu and Social Menu
- Breadcrumb Options: Option to enable/disable Breadcrumb on Homepage/Frontpage or Entire site. option to enable/disable breadcrumb and option to change separator
- Excerpt Options: Option to change Excerpt Length(words) and Read More Text
- Services: Option to use custom post type as services. For that you need to Essential Content Type Plugin.
- Featured Content: Option to use Custom Post type(requires Essential Content Type Plugin) as featured content, enable/disable featured content on entire site or frontpage/homepage
- Featured Slider: Option to choose Page as Featured Slider,further option to enable/disable slider on Homepage/Frontpage and Entire Site, Select Transition Effect, Transition Delay and Transition Length, Image Loader, choose No of Slides and choose numbers of sliders
- Hero Content: Option to choose Page as hero content, further option to enable/disable hero content, enable/disable title and edit display content
- Homepage/Frontpage Setting: Select option to show post from selective category
- Layout Options:
- Site Layout: Option to choose from Fluid and Boxed Layout
- Default Layout: Option to choose from: i. Right Sidebar( Content,Primary Sidebar) and ii.No Sidebar
- Homepage/Archive Layout: i. Right Sidebar( Content,Primary Sidebar) and ii.No Sidebar
- Single Page/Post Image Layout: Option to enable/disable single page/post layout
- Logo Slider: Option to use page as logo slider, enable/disable logo slider in homepage/frontpage or entire site, change background, edit titte sub title
- Pagination Options: Option to choose Pagination type from i. Default(Older Posts/Newer Posts), ii. Numeric (Requires WP-PageNavi Plugin) and iii. Infinite Scroll)
- Portfolio: Option to enable/disable Portfolio in Homepage/Frontpage and entire site. Option to select Custom Post Type (requires Essential Content Type Plugin ) as portfolio
- Scroll Up: Option to enable/disable scroll up options
- Search Options: Option to edit Default Display text in search
- Stats: Option to use Page as stats, enable/disable stats on homepage/frontpage or entire site, edit background image, add remove title, sub title and add number of items
- Testimonials : Option to enable/disable Testimonials in Homepage/Frontpage and entire site. Select content type as Custom Post Type (requires Essential Content Type Plugin ). Option to select layout for testimonials
- Single Post Navigation: Option to enable/disable Single Post Navigation
- Additional CSS: Option to add your own CSS style to change the design as per you need
- Widgets Areas: 4 Widget areas to choose from 1. Primary Sidebar, 2. Footer Area 1, 3. Footer Area 2, 4. Footer Area 3
- Widgets: Option to choose CT: Social Icons
- Portfolio :Option to enable/disable Portfolio in Homepage/Frontpage and entire site. (requires Essential Content Type Plugin ).
- Testimonials : Option to enable/disable Testimonials in Homepage/Frontpage and entire site. (requires Essential Content Type Plugin )
- Reset all Settings: Option to reset all the settings to default
Features in “Adonis Pro” Premium Theme:
- Colors: Additional option to choose from base color scheme (default, dark, gray, red and yellow), header text color, background color, page background color, secondary background color, main text color, button text color, button text hover color, button background color, button hover background color, link color, link hover color, border color and section background color
- Comment Options: Option to use WordPress setting for comments or disable it completely or in pages
- Contact Info: Option to choose contact info type as as Post, Page or Custom , option to enable/disable contact info on homepage, edit title, edit description, edit phone title, phone, email title, email, address title, address, add custom content
- Services: Option to choose type as Page, Post, Category Image and custom posty types, enable/disable homepage/frontpage or entire page, select items layout, edit title and content
- Featured Content: Option to select Page, Post, Category and Image as Featured Content
- Featured Slider: Option to choose Page, Post, Category and Image as Featured Slider
- Font Family Options: Option to choose Default Font Family, Site Title Font Family, Site Tagline Font Family, Content Title Font Family, Content Body Font Family, Headings Tags from h1 to h6 Font Family and reset fonts
- Footer Editor Options: Option to edit Footer Content
- Hero Content: Select content type as Page, Post, Category and Image further option to choose no of Hero content, Display Content and enable/diable title
- Homepage/Frontpage Setting: Select option to show post from selective category, edit recent post heading, recent post sub heading
- Layout Options:
- Default Layout: Additional 2 options to choose default layout which makes total of 4 they are: i. Right Sidebar(Content, Primary Sidebar), ii. Left Sidebar(Primary Sidebar, Content), iii. No Sidebar and iv. No Sidebar:Full Width
- Homepage/Archive Layout: Addition 2 options to choose which makes total of 4 they are: i. Right Sidebar(Content, Primary Sidebar), ii. Left Sidebar(Primary Sidebar, Content), iii. No Sidebar and iv. No Sidebar:Full Width
- Archive Content Layout: Additional 3 options which to choose from i. 2 columns, ii. 3 columns and iii. 4 columns
- Single Page/Post Image Layout: Option to choose i.Post Thumbnail, ii. Slider Image Size(1920*1080) and iii. Original Image Size
- WooCommerce Layout: i. Right Sidebar(Content,Primary Sidebar), ii. Left Sidebar(Primary Sidebar, Content), iii. No Sidebar and iv. No Sidebar:Full Width
- Logo Slider: Option to choose from Page, Post, Category and Image, enable/disable logo slider in entire page or homepage/frontpage, edit background image, transition delay, transition length, edit title, sub-title, number of items, number of visible items
- Menu Options: Additional option to choose menu type as Modern or Classic, option to enable/disable search box in header
- Portfolio :option to choose content from Post, Page, Category, Image and Custom Post Type (requires Essential Content Type Plugin ), enable/disable Portfolio in Homepage/Frontpage and entire site, layout options
- Skills: Option to show case your skills in percentage, edit title, sub title and content
- Stats: Option to choose Post, Page, Category, Image and Custom Post Type (requires Essential Content Type Plugin )
- Testimonials :Option to enable/disable Testimonials in Homepage/Frontpage and entire site. Select content type as Post, Page, Category, Image and Custom Post Type (requires Essential Content Type Plugin ). Option to select layout for testimonials
- Update Notifier: Option to enable/disable update notifier
- WooCommerce Options: Option to enable/disable Zoom, Lightbox and Slider effects for WooCommerce Product Gallery
- Widgets Areas: Additional 10 widget areas which makes total of 14 Widget areas to choose from 1. Sidebar, 2. Footer Area 1, 3. Footer Area 2, 4. Footer Area 3, 5. Footer Area 4, 6. WooCommerce Sidebar, 7. 404 Page Not Found Content, 8. Optional Homepage Sidebar, 9. Optional Archive Sidebar, 10. Optional Page Sidebar, 11. Optional Post Sidebar, 12. Optional Sidebar One, 13. Optional Sidebar Two and 14. Optional Sidebar Three
- Reset all Settings: Option to reset all the settings to default
- WooCommerce for e-commerce
- WPML Ready for multi-language
Installation Using the WordPress Administration Panel #
You can download Themes directly to your blog by using the Add New Themes option in the Appearance sub-menu.
- Download Adonis Frame from your Catch Themes site at https://catchthemes.com/themes/adonis/ to your Desktop
- Log in to the WordPress Administration Panel
- Go to “Appearance => Themes => Add New”
- Click on “Uploads” and Browse the downloaded file Adonis.zip from the desktop where you have it downloaded
- Click on “Install Now” and then “Activate” to install the Theme
Manual Installation using FTP
To add a new Theme to your WordPress installation, follow these basic steps:
- Download Adonis from your Catch Themes site at https://catchthemes.com/themes/adonis/ to your Desktop
- Unzip adonis.zip to your Desktop
- Using an FTP client to access your host web server. Go to /wp-content/themes/ and make sure that you do not already have a adonis folder installed. If you do, then back it up and remove it from /wp-content/themes/ before uploading your copy of Adonis
- Upload Adonis to /wp-content/themes/
- Activate adonis through “Appearance => Themes”, in your WordPress Dashboard
Updating Theme Using the Administration Panel #
You can update Themes directly from the Administration Panel using Catch Updater plugin. Click here to read details about Catch Updater plugin.
Updating Theme Using FTP
To update Theme though FTP, follow these basic steps:
- Download Adonis from your Catch Themes site at https:catchthemes.com/themes/adonis/ to your Desktop
- Unzip adonis.zip to your Desktop
- Using an FTP client to access your host web server, go to /wp-content/themes/ and upload your new copy of Adonis Theme which shall replace the old files
Always Set Featured Images #
This theme relies heavily on Featured Images. If your post is missing a Featured Image, the post image will not show up on homepage, on archived pages and on Featured Page Slider Content. Click Here to see how to add Featured Image in your Post/Page.
Image Sizes:
Post Thumbnail
Width: 640px
Height: 480px
Portfolio
Same as Post Thumbnail
Services
Width: 100px
Height: 100px
Featured Slider
Width: 1920px
Height: 954px
Testimonial Image
Width: 240
Height: 240px
Featured Content Image
Width: 640px
Height: 480px
Hero Content Image
Width: 592px
Height: 592px
Custom Logo
Width: 225px(fixed)
Height: 225px(fixed)
How to add Featured Image in Post/Page?
- Open the editor of the post/page where you want to display image, and locate the Featured Image module in the bottom right corner under Page Attributes. Click on Set featured image.
- Then you can either upload the image from your computer or select the existing image from your media library and click on Set Featured Image.Click to view screenshot
- For more detail, click here to watch video Screencast
Regenerate Thumbnails #
If you have just changed your theme then you need to regenerate image thumbnail for post published before activating this theme. You can simply install Regenerate Thumbnails Plugin. Then Regenerate Thumbnails through “Tools => Regen. Thumbnails” in your WordPress Dashboard.
Widgets Areas (Sidebar)#
Adonis currently has 4 widgetized areas(Sidebar) they are 1. Sidebar, 2. Footer Area 1, 3. Footer Area 2 and 4. Footer Area 3. You can add a variety of Widgets to this theme from “Appearance => Widgets” or “Appearance => Customize => Widgets” in WordPress.
Customizer (Theme Options) #
You can customize this theme using cool additional features through Customizer at “Appearance => Customize” from your WordPress Dashboard.
How to add Logo? #
- Go to “Appearance => Customize => Site Identity”
- You can replace the default logo by clicking on it, or click on “Add new Image”
- Then you can either upload the image from your computer or select the existing image from your media library
- Finally, click on “Save & Publish”
How to enable/disable Site Title and Tagline #
- Go to “Appearance => Customize => Site Identity”
- Uncheck “Display Site Title and Tagline” and it will display Site Title and Tagline
- Finally, click on “Save & Publish”
How to add Site Icon (Favicon/Web Clip Icon)? #
- Go to “Appearance => Customize => Site Identity => Site Icon”
- Click on “Select Image” and then you can either upload the image from your computer or select the existing image from your media library
- Finally, click on “Save & Publish”
Header Image #
Custom Header Image is different from site logo. It’s a large global image in the header to obtain a much more personalized look and feel. To add header image, you need to go to “Appearance => Customize => Header Media =>Header Image”. Here, you can add/change/hide Header Image, select option to Enable Featured Header Image on, Size and add in links and alt tag as per your website need.
Options to Enable Header Featured Image
When you are in “Appearance => Customize => Header Media => Header Image”, you will see option “Enable Featured Header Image on”. There are 7 options, which gives you flexibility to add Header Image as per your website need.
Option 1: Homepage/Frontpage
This option will show header image in Homepage/Frontpage only.
Option 2: Excluding Homepage
This option will show header image throughout the site, excluding Homepage.
Option 3: Excluding Homepage, Page/Post Featured Image
This option will show header image throughout the site excluding Homepage. But in Page/Post, your header image will be replaced by Featured Image.
Option 4: Entire Site
This option will show header image throughout the site.
Option 5: Entire Site, Page/Post Featured Image
This option will show header image throughout the site. But in Page/Post, your header image will be replaced by Featured Image.
Option 6: Page and Post
This option will show Header Image in Page and Post only. But in Page/Post, your header image will be replaced by Featured Image.
Option 7: Disable
This option will disable Header Image completely.
How to Change and Enable Custom Header Image? #
- Go to “Appearance => Customize => Header Image”
- Now, select enable options in “Enable Featured Header Image on”
- Click on “Add New Image” to add new header image
- Then you can either upload the image from your computer or select the existing image from your media library
- Click on “Select and Crop” and you can either crop image or skip cropping
- Finally, click on “Save & Publish”
How to enable/disable Header Featured Image Options in different Pages/Posts?
This can be achieved through custom meta box by following the steps below:
- Go to Edit option of Page/Post you want to edit
- There you can find Adonis Options
- Then click on Header Featured Image Options
- You can select “Enable” option for Header Featured Image
- Finally Click on “Publish/Update”
How to select Single Page/Post Image Layout for individual Page/Post?
This can be achieved through custom meta box by following the steps below:
- Go to Add/Edit option of Page/Post
- There you can find Adonis Options
- Then click on Single Page/Post Image Layout
- You can select desired option
- Finally Click on “Publish/Update”
Menus #
Adonis offers exciting Menu Options! This theme supports and recommends using “Custom Menus”. You can create Custom Menu through “Appearance => Menus” from your WordPress Dashboard.
- For more detail, Click here to watch video Screencast
Select Menu Locations
You can assign your custom menu in 2 different locations. You assign it either from “Appearance => Customize => Navigation” or from “Appearance => Menus => Manage Locations”
Select your Custom Menu as Primary Menu to display it as the Main Menu, which will replace the default Page Menu
Select your custom menu as Social Menu
Note: If you do not see Navigation Option in “Appearance => Customize”, it will mean you have not created any menu. Go to “Appearance => Menus” to create menu first.
How to enable Breadcrumb and change separator? #
- Go to “Appearance => Customize => Theme Options => Breadcrumb Options”
- Check option “Check to enable Breadcrumb” to enable Breadcrumb
- To enable Breadcrumb on Homepage, check option “Check to enable Breadcrumb on Homepage”
- To change the separator between Breadcrumbs, use desired separator below “Separator between Breadcrumbs”
- Finally, click on “Save & Publish”
Comment Options #
- Go to “Appearance => Customize => Theme Options => Comment Options”
- Under “Comment Option” select desired option from Use WordPress setting, Disable in Pages and Disable Completely
- To disable note below comments box, check option “Check to Disable Notes”
- To disable website field, check option “Check to Disable Website Field”
- Finally, click on “Save & Publish”
Contact Info #
Adonis supports Page as contact info. For Contact Info, go to “Appearance => Customize => Theme Options => Contact Info”.
How to enable Contact Info?#
- Go to “Appearance => Customize => Theme Options => Contact Info” from your WordPress Dashboard
- To enable Contact Info, select “Homepage/Frontpage or Entire Site” option under “Enable on”
- Under Page, select page you want to display as contact info
- Finally, click on “Save & Publish”
You can further edit title, description, phone title, phone, email title, email, address title, address
How to Change the Excerpt Length and Read More Text? #
- Go to “Appearance => Customize => Theme Options => Excerpt Options”
- Type in the Excerpt Length as in, the number of words, and Read More Text
- Finally, click on “Save & Publish”
Services #
Adonis supports Custom Post type’s services as services. For services you need install our free plugin need to install Essential Content Type Plugin then, go to “Appearance => Customize => Theme Options => services”.
How to enable Page Content?#
- Go to “Appearance => Customize => Theme Options => Testimonials”
- Under “Enable on” select Homepage/Frontpage or Entire Site
- Finally, click on “Save & Publish”
How to add services in Homepage/Frontpage using Essential Content Type?#
Follow these steps to showcase projects on your site:
- First you need to install Essential Content Type
- After that you can find Essential Content Type option in your WordPress Dashboard
- Click on “Essential Content Type”, there you can see “Services” option then you need to on the button of Services option(This option is enabled by default)
- Then go to “Customize => Theme Options =>Services” and choose number of items to show in frontpage
- Select the services under choose services1, services2 and so on
- Finally, click on “Save & Publish”
How to select number of Services?#
- Make sure Services is enabled
- Go to “Appearance => Customize => Theme Options => Services” from your WordPress Dashboard
- Under “No of items”, select number of services you want to display
- Finally, click on “Save & Publish”
Featured Content #
Adonis supports Page as featured content. For Featured Content, go to “Appearance => Customize => Theme Options => Featured Content”.
Page (Featured Content)
Page is created to highlight your Page in the featured content. So, first you need to create a Page and then add Featured Image to the Page.
How to enable Page Content?#
- Make sure featured content is enabled
- Then, select Page in Featured Page 1, Featured Page 2 and so on, select the pages you want to display as featured content.
- Finally, click on “Save & Publish”
Note:
When you select page, make sure your Page have Featured Image. Click here to watch our Video Screencast to add Featured Image.
How to change number of Featured Content?#
- Make sure featured content is enabled
- Go to “Appearance => Customize => Theme Options => Featured Content” from your WordPress Dashboard
- Under “No of items” set number of Featured Content as required(You need to save and refresh the page after changing number of Featured Content)
- Finally, click on “Save & Publish”
How to enable/disable title?#
- Make sure featured content is enabled
- Go to “Appearance => Customize => Theme Options => Featured Content” from your WordPress Dashboard
- Check option, “Check to Enable Title” to Enable Featured Content Title
- Finally, click on “Save & Publish”
How to show/hide content in Featured Content?#
- Make sure news is enabled
- Then under “Display Content”, you need to select “Show Excerpt”, “Show Full Content” or “Hide Content”
- Finally, click on “Save & Publish”
Featured Slider #
Adonis supports Page as featured slider. For Featured Slider Options, go to “Appearance => Customize => Theme Options => Featured Slider”.
Page (Featured Slider)
Page slider is created to highlight your Page in the slider. So, first you need to create a Page and then add Featured Image to the Page.
How to enable Page Slider?#
- Make sure featured slider is enabled
- Then, select in Page in Page # 1, Page # 2 and so on, to display as slider
- Finally, click on “Save & Publish”
How to change Transition Effect, Transition Delay and Transition Length on Slider?#
- Make sure featured slider is enabled
- Go to “Appearance => Customize => Theme Options => Featured Slider” from your WordPress Dashboard
- To change Transition Effect, select option under “Transition Effect”
- To change Transition Delay, change number of second(s) under “Transition Delay” as per your need
- To change Transition Length, change number of second(s) under “Transition Length” as per your need
- Finally, click on “Save & Publish”
Image Loader#
- Go to “Appearance => Customize => Theme Options => Featured Slider” from your WordPress Dashboard
- Under “Image Loader”, select “True, False or Wait” as per your need
- Finally, click on “Save & Publish”
Note:
True: Fixes the height overlap issue. Slideshow will start as soon as two slider are available. Slide may display in random, as image is fetch.
Wait: Fixes the height overlap issue. Slideshow will start only after all images are available.
How to change number of slides?#
- Make sure featured slider is enabled
- Go to “Appearance => Customize => Theme Options => Featured Slider” from your WordPress Dashboard
- Under “No of Slides”, select the number slides as per your need
- Finally, click on “Save & Publish”
Note: To see changes in No of Slides please refresh the customizer page
Hero Content #
Adonis supports Page as Hero Content. For Hero Options, go to “Appearance => Customize => Theme Options => Hero Content”.
How to enable Hero Content? #
- Go to Appearance => Customize => Theme Options => Hero Content
- To enable Hero Content, select option Entire Site or Homepage/Frontpage under “Enable Hero Content on”
- Under “Page” if you choose Page you want to display as hero content
- Finally, click on “Save & Publish”
How to Set Certain Categories to Display in Homepage/Frontpage? #
- Go to “Appearance => Customize => Theme Options => Homepage/Frontpage Options”
- Then select the category you want, and you may select multiple categories by holding down the CTRL key(windows)/Command Key(Mac)
- Option to edit, recent post heading, recent posts sub heading
- Finally, click on “Save & Publish”
Layout Options #
Adonis has 2 Site Layout, 4 Default Layout, 4 Homgepage/Archive Layout, 4 Single Page/Post Layout, 4 Archive Content Layout, 4 Single Page/Post image layout and 4 Woocommerce Layout to choose from “Appearance => Customize => Theme Options => Layout Options”
Site Layout
Choose your site site layout as Fluid or Boxed
Default Layout Options
Once you are in Layout Options, you can Check the box below “Default Layout Options” which will set our site layout. Further, you have the choice of selecting custom layout for individual pages and posts through “Adonis Options => Layout Options”, which you shall find below individual posts and pages, when you click on them for adding/editing.
Homepage/Archive Layout
Once you are in Layout Options, you can Check the box below “Homepage/Archive Layout” which will set our layout for Homepage/Archive Page. Further, you have the choice of selecting custom layout for individual pages and posts through “Adonisl Trainer Options => Layout Options”, which you shall find below individual posts and pages, when you click on them for adding/editing
Single Page/Post Layout
Once you are in Layout Options, you can Check the box below “Single Page/Post Layout” which will set layout for single pages/posts.
Archive Content Layout
Once you are in Layout Options, you can Check the box below “Archive Content Layout” which will set our site archive layout.
Single Page/Post Image Layout
Once you are in Layout Options, you can Check the box below “Single Page/Post Image Layout” which will set our posts/page image layout. Further, you have the choice of selecting Single Page/Post Image Layout for individual pages and posts through “higher-education Options => Single Page/Post Image Layout”, which you shall find below individual posts and pages, when you click on them for adding/editing
Logo Slider #
Adonis support Page as logo slider.
- Go to “Appearance => Customize => Theme Options => Logo Slider”
- Enable logo slider under option “Enable on”
- Then, select the page under Page1, Page2 and so on to display as logo slider
- Further option to change title, sub title, background image and number of items
- Finally, click on “Save & Publish”
How to change Pagination Options? #
- Go to “Appearance => Customize => Theme Options => Pagination Options”
- Under “Pagination Type”, select desired option
- Finally, click on “Save & Publish”
Note: WP-PageNavi Plugin is recommended for Numeric Option(But will work without it).
Portfolio
Portfolio option in Adonis is used to highlight Custom Post Type as your portfolio.
How to enable Portfolio? #
- Go to Appearance => Customize => Theme Options =>Portfolio
- To enable Portfolio, select option Entire Site or Homepage/Frontpage under “Enable Portfolio on”
- Under “Select Type”, you need to select “Post, Page, Category or Image” as per your need
- Finally, click on “Save & Publish”
How to change number of portfolio?#
- Make sure portfolio is enabled
- Go to “Appearance => Customize => Theme Options =>Portfolio” from your WordPress Dashboard
- Under “No of Portfolio”, select the number portfolio as per your need
- Finally, click on “Save & Publish”
Note: To see changes in No of Portfolio please refresh the customizer page.
How to add Portfolio in Homepage/Frontpage using Essential Content Type?#
Follow these steps to showcase projects on your site:
- First you need to install Essential Content Type
- After that you can find Essential Content Type option in your WordPress Dashboard
- Click on “Essential Content Type”, there you can see “Portfolio/Projects” option then you need to click on the button of Portfolio/Projects option(This option is enabled by default)
- Then go to “Customize => Portfolio” and choose number of items to show in frontpage
- Finally, click on “Save & Publish”
Note: To edit Portfolio Archive Title, Archive Content and Archive Featured Image, go to Customize => Portfolio”
How to disable Scrollup feature? #
- Go to “Appearance => Customize => Theme Options => Scrollup Options”
- Check option “Check to disable Scroll Up”
- Finally, click on “Save & Publish”
How to change default text in search box? #
- Go to “Appearance => Customize => Theme Options => Search Options”
- Change the text below “Display Default Text in Search”
- Finally, click on “Save & Publish”
Stats #
Adonis supports Stats as Page.
- Go to “Appearance => Customize => Theme Options => Stats”
- Enable stats by click option under “Enable on”
- Then under Page1, Page2 and so on choose the pages you want to display as stats
- Further option to change number of items, title, sub title and background image
- Finally, click on “Save & Publish”
Testimonials
Adonis Custom Post Type for Testimonials. For that you need to install Essential Content Type Plugin
How to enable Testimonial? #
- Go to “Appearance => Customize => Theme Options => Testimonials”
- Under “Enable on” select Homepage/Frontpage or Entire Site
- Finally, click on “Save & Publish”
How to add Testimonials in Homepage/Frontpage using Essential Content Type?#
Follow these steps to showcase projects on your site:
- First you need to install Essential Content Type
- After that you can find Essential Content Type option in your WordPress Dashboard
- Click on “Essential Content Type”, there you can see “Testimonial” option then you need to on the button of Testimonials option(This option is enabled by default)
- Then go to “Customize => Testimonial” and choose number of items to show in frontpage
- Select the testimonials under Testimonial1, Testimonial2 and so on.
- Finally, click on “Save & Publish”
How to select number of Testimonial?#
- Make sure Testimonial is enabled
- Go to “Appearance => Customize => Theme Options => Testimonial” from your WordPress Dashboard
- Under “No of items”, select number of testimonial you want to display
- Finally, click on “Save & Publish”
Note: To see changes in No of Testimonial please save and refresh the page.
Note: To enable slider in courses check option “Check to Enable Slider”
Widgets #
Adonis suppots CT: Social Icons. You can add widget in widget area as per your need.
How to add Widgets in widget area? #
You can add widgets to your widget area from two location
1. Go to “Appearance => Widget”, then drag the widget to the widget area or you can click in the widget then list of widget area will appear, now you can choose desired widget area and click on “Add Widget”.
2. Go to “Appearance => Customize => Widgets”, then you can find list of widget area. Click on the any widget area and you will see “Add a Widget” option by click on it you can find list of Widget which you can add to respected widget area.
How to add “Social Icon” in widget area(CT:Social Icon)? #
This widget is used to add social icons as a widget.
- Add CT:Social Icon to desired widget area. More Info
- Add “Title” under the respective field.
- Finally, click on “Save & Publish”
Embed Multimedia into Posts or Pages #
For externally hosted videos (for example a YouTube or Vimeo video), you can directly paste the link of your video page into the content editor. You do not necessarily have to paste the embed code in the content. WordPress will automatically embed the video from the link.
Webmaster Tools #
We have moved Webmaster Tools to our plugin Catch Web Tools for better management and data access. So, just install Catch Web Tools plugin and activate “Webmaster Tools” from Catch Web Tools plugin dashboard. You can verify your site on Google, Yahoo and Bing by adding in the IDs in the respective boxes through “Catch Web Tools => Webmaster Tools” in your WordPress Dashboard. Further, you can add in the Google Analytic. Adding scripts in Header and Footer does not require you to edit codes through Webmaster Tools.
How to Insert Site Verification IDs?
- Go to “Catch Web Tools => Webmaster Tools => Site Verification” in your WordPress Dashboard
- Enter the Site Verification ID (Google, Yahoo, Bing) wherever you wish to verify your site
- Click on Save Changes button
How to Insert Analytics / Other Scripts in Header/Footer?
- Go to “Catch Web Tools => Webmaster Tools => Header and Footer Scripts” in your WordPress Dashboard
- Here you can add in various scripts like, Google, Facebook etc.
- Enter the script in upper text area, for text you want to load on Header
- Enter the script in lower text area, for text you want to load on Footer
- Click on Save Changes button
Recommended Plugins
* Catch Web Tools for Webmaster Tools, To Top, Catch IDs
* Essential Content Type
* Contact Form 7 for Contact Form
* Regenerate Thumbnails to for Regenerating Thumbnails
* Jetpack for Infinite Scroll, Gallery, Stats, Image CDN and many more