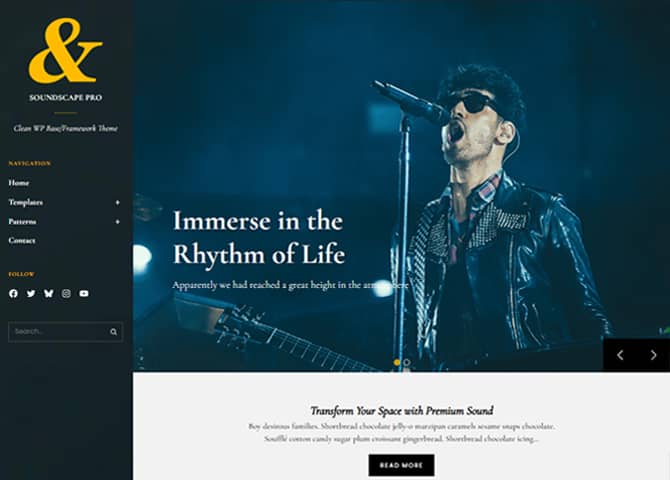
Soundscape Pro is a premium block-based WordPress theme designed for creators, businesses, and online sellers who want a visually striking, modern, and highly customizable website. Perfect for musicians, bands, photographers, creative professionals, and corporate brands, this versatile theme offers a seamless blend of aesthetics, performance, and powerful eCommerce capability. Built fully with the WordPress Site Editor, Soundscape Pro gives you complete design freedom with 40+ beautifully crafted block patterns, 15+ flexible template parts, and 20+ ready-to-use templates. You can effortlessly mix, match, and customize layouts to build a unique site that matches your vision. Bring your ideas to life with Soundscape Pro, a perfect harmony of design, functionality, and customization.

Features
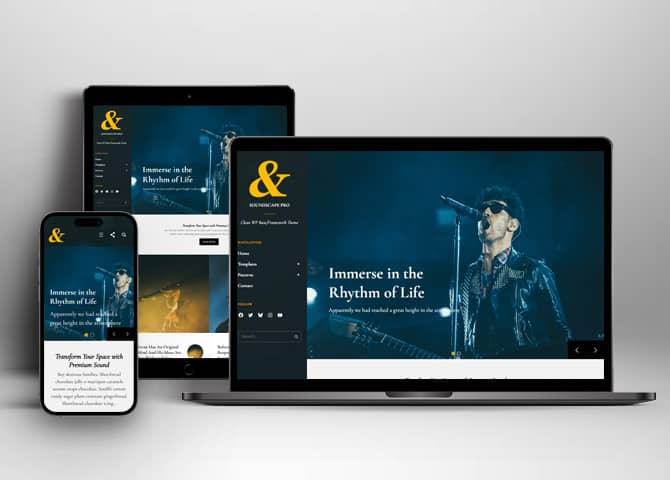
Responsive Design
One of the key features of our themes is that your website will magically respond and adapt to different screen sizes delivering an optimized design for iPhones, iPads, and other mobile devices. No longer will you need to zoom and scroll around when browsing on your mobile phone.
Webmaster Tools
Webmaster Tools option helps you to minutely manage your site. Firstly, it helps to verify the site in Google, Yahoo and Bing. Additionally, whether it is something like site optimization, keeping track of your site traffic or overseeing and altering your display settings, you can call the shots for you site through Webmaster tools. These tools also allow you to add to your site Header and Footer Scripts like Google Analytics, Site Stats, Facebook, twitter and much more.
Incredible Support
We have a great line of support team and support documentation. You do not need to worry about how to use the themes we provide, just refer to our Tech Support segment. Further, if you need to do advanced customization to your website, you can always hire our theme customizer!
Featured Image Slider
Featured Image Slider allows you to not only add images, but also write a description for them. If a descriptive caption would not suffice, you also have the option of providing a clickable link. This way, as per your unique needs, should you require, you can easily add a URL to your content.
Featured Content
Featured Content allows you to highlight your recent & popular posts on your website. It can either be displayed on Homepage or the entire site. You can add your title and sub-title for featured content, select the number of featured content, display Meta, select multiple categories, and enjoy displaying your featured & recent posts.
Services
Every website owner wants the world to know about the services they provide. It allows you to place the services you provide for your customers on the spotlight. Choose to display the services in 2 to 4 columns. Display your services on the homepage only or on the entire website.
Custom Fonts
You can choose different types of stylish and engaging fonts for your Site Title, Tagline, Headline Tags, Content Title, and Content Body. Choose the font that suits best for your website from the font family options and makes your website more striking.
Hero Content
You can now display the best assets of your website with the Hero Content feature. The feature allows you to highlight the most important content in a fashion that is easily attention-grabbing. You can enable the hero content either on Homepage or the entire site. Hero Content - the easiest way to display your strengths.
WordPress Standard Codes
Our code is secure and optimized. We do proper data validation and sanitization and follow core theme guidelines. Our developers are active contributors to WordPress theme review and WordPress core. Our themes will always be updated as things change in WordPress.
Testimonials
People are always curious about what your goods and services are really like. Since customer testimonials are candid and not by the company promoting the product, they assist in building trust. You can display testimonials on Homepage, the entire site or disable it completely.
Portfolio
Portfolio empowers you to showcase your professional skills and accomplishments to the world at large. Display your Portfolio in an elegant manner on the Homepage/Frontpage, the entire site or you can also disable it completely if you don’t need it. An astounding way to easily display your experience, skills, talent, and expertise.
Sections Sorter
Sections Sorter allows you to organize various sections on your website by manually sorting them. Simply drag and drop the sections to your desired position and display them orderly.The cool feature in this option is that you can not only rearrange the order but also can quickly edit those sections from Sections Sorter option if you want any changes.
Footer Editor
Footer Editor Options enables you to edit the content of the footer easily. You can either add HTML, plain text, or custom shortcodes which will be inserted into your theme automatically. You can use shortcodes like [the-year], [site-link] and [privacy-policy-link] for the current year, site link and privacy policy link respectively.
Full Site Editing
Customize your whole website design directly from the Front-End and build something magical. Change your site layout and add blocks/patterns directly on the site whilst working on the page content. Super easy to create dynamic content!
Custom Blocks
Enhance the pages of your website with the blocks. Generally, these custom blocks are more dynamic and have amazing designs. Create a page independently.
Multiple Block Patterns
Comes with a collection of predefined block design layouts, available from the patterns tab of the block inserter. Create an elegant layout that combines different blocks. Build Gracefully!
FSE Pro Plugin
This theme comes with the FSE Pro plugin as a bundle. FSE Pro is a Premium Full Site Editing WordPress Plugin that extends Gutenberg Blocks and Patterns to give your website a unique look and feel. This premium plugin provides you with more control over your site blocks and patterns to build your site with the premium design and creation tools.
More Features
- Responsive Design
- Alternative Styles
- Page Templates
- Color Options
- Featured Thumbnail
- Threaded Comments
- Dropdown Menu
- Gravatar Ready
- Localized for translations
- Custom Header / Logo
- Custom Menu
- Custom Footer
- Custom Background
- Custom Layout
- Custom Fonts
- Custom Homepage
- Custom CSS
- Support
- WooCommerce Ready
- WPML Ready
- Header Highlight Content
- Hero Content
- Portfolio
- Logo Slider
- News
- Events
- Testimonials
- Services
- Header Video
- Clean Header
- Full HD Screens
- Featured Content
- WordPress Standard Codes
- Promotion Headline
- Sections Sorter
- Teams
- Products
- Full Site Editing
- Block Based Theme
- Site Editor
- Patterns
- Blocks
- Template Editing
- Global Styles
Free Vs Pro (Premium)
| Free | Features | Pro (Premium) |
|---|---|---|
| Responsive Design | ||
| Super Easy Setup | ||
| Blog Section (Block) | ||
| Contact Form With Info (Block) | ||
| Contact Form (Block) | ||
| Contact Info 3 Col (Block) | ||
| FAQ (Block) | ||
| Featured Category Slider (Block) | ||
| Featured Category (Block) | ||
| Featured Content (Block) | ||
| Featured Content Three Col (Block) | ||
| Featured Products (Block) | ||
| Google Map (Block) | ||
| Header Media (Block) | ||
| Hero Content (Block) | ||
| Hero Content Full Width (Block) | ||
| On Sale Products (Block) | ||
| Our Identity (Block) | ||
| Our Story | ||
| Portfolio (Block) | ||
| Products Carousel (Block) | ||
| Promotional Headline (Block) | ||
| Promotional Message (Block) | ||
| Service (Block) | ||
| Services With Thumbnail (Block) | ||
| Slider (Block) | ||
| Stats (Block) | ||
| Team Members (Block) | ||
| Testimonial (Block) | ||
| Testimonial Slider (Block) | ||
| Testimonial Slider With Background Image (Block) | ||
| Top Rated Products (Block) | ||
| Woo Features (Block) | ||
| Archive | ||
| Footer Widgets | ||
| Footer | ||
| Hidden 404 | ||
| Hidden Comments | ||
| Hidden No Results | ||
| Hidden Post Meta | ||
| Hidden Post Navigation | ||
| Hidden Search | ||
| Post Header | ||
| Sidebar | ||
| FrontPage Template: Template Home Blogging | ||
| FrontPage Template: Template Home | ||
| FrontPage Template: Template Ecommerce | ||
| Page Template: Page About Us | ||
| Page Template: Page Our Services | ||
| Page Template: Page Contact Us | ||
| Page Template: Page Home Blogging | ||
| Woo Sidebar | ||
| Template: Archive Product | ||
| Template: Archive | ||
| Template: Blog | ||
| Template: Single Page No Sidebar Full Width | ||
| Template: Single Page No Sidebar | ||
| Template: Single Post No Sidebar Full Width | ||
| Template: Single Post No Sidebar | ||
| Template: Home Blogging | ||
| Template: Home | ||
| Template: Home Ecommerce | ||
| Parts: All Products | ||
| Parts: Comments Post Page | ||
| Parts: Footer With Widgets | ||
| Parts: Footer | ||
| Parts: Header With Cart | ||
| Parts: Header | ||
| Parts: Product Collection | ||
| Parts: Page Content Full Width | ||
| Parts: Post Content Full Width | ||
| Parts: Sidebar | ||
| Parts: Woo Sidebar |
Theme Instructions
How to install theme?
Go to this link
How to update theme to the latest version?
Go to this link
Frequently Asked Question
Before starting please visit our Frequently Asked Question link, to know more about Full Site Editing Themes
Installing Required Plugin for Soundscape Pro
Soundscape Pro comes with our Premium Plugin FSE Pro. After you purchase Soundscape Pro, the plugin comes bundled with theme. As most of the blocks and patterns are inherited with the pro plugin we have bundled the theme and plugin together. You can install and activate it with clicking few buttons
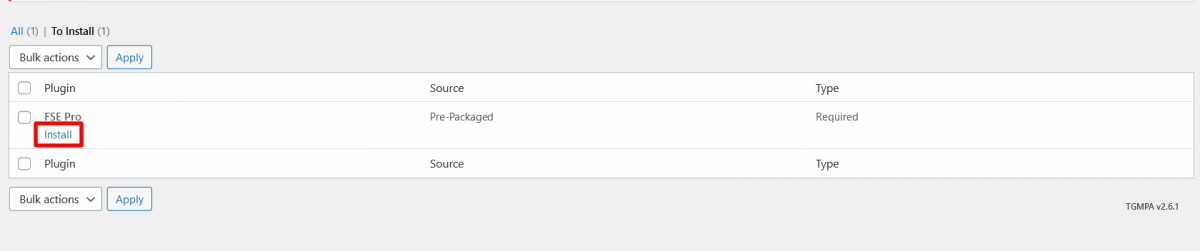
1. After installation of theme, go to WordPress Dashboard, there you will find notice “This theme requires the following plugin: FSE Pro”, click on “Begin Install Button” as shown in the picture below:

2. Then Click on “Install” button
3. After Installation of FSE PRO Plugin click on “Return to Dashboard Button” to enter license key
4. Get your product license key from the My Account Page. Activating your license key is mandatory.
5. Enter plugin’s license key from Plugins -> FSE Pro plugin license and click on Activate License
Note: Please visit FAQ for FSE Pro Plugin if you have any confusion regarding plugin installation
How to Open Site Editor?
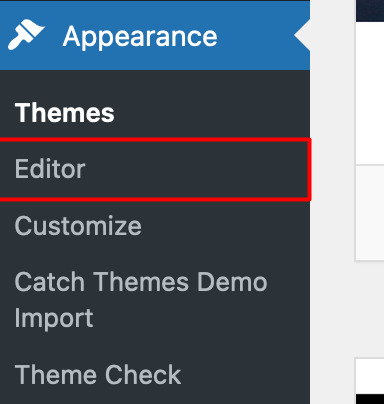
If you are on WordPress Dashboard then go to “Appearance -> Editor” to open the Site Editor.
If you are on Site Front-End then you will see WP Admin Bar on the top of the page, click on “Edit Site” to open the Site Editor.

Add and Edit Menu
You can Select predefined menu and create you own customized menu.
Go to this link for Navigation Block
1. This Video show how to create your own custom menu:
2. This video shows how to select predefined menu:
Site Navigation Menu
Please visit this link for Navigation Block. You can edit existing menu or create a new one.
How to work with Soundscape Pro Blocks and Patterns
After opening site editor, there are 3 ways you can add Blocks and Pattern in you website:
There are three ways to add a block using the Block Inserter (+) icon.
- Click on the Block inserter (+) icon in the top toolbar and Click on Patterns. Browse the Patterns and select the one that you like to add.
- Click on the Block inserter (+) icon to the right of an empty block, after that Click on the Browse All button, and finally Click on Patterns. Browse the Patterns and select the one that you like to add.
- Click on the Block inserter (+) icon in between blocks, after that Click on the Browse All button, and finally Click on Patterns. Browse the Patterns and select the one that you like to add.

Once the section is selected you can edit its content or if you want to customize the section’ properties/options, click the three dots and select your desired action. Duplicate, Remove, Copy or Add desired section before or after the current section.
Go to this link to know more about adding blocks and patterns
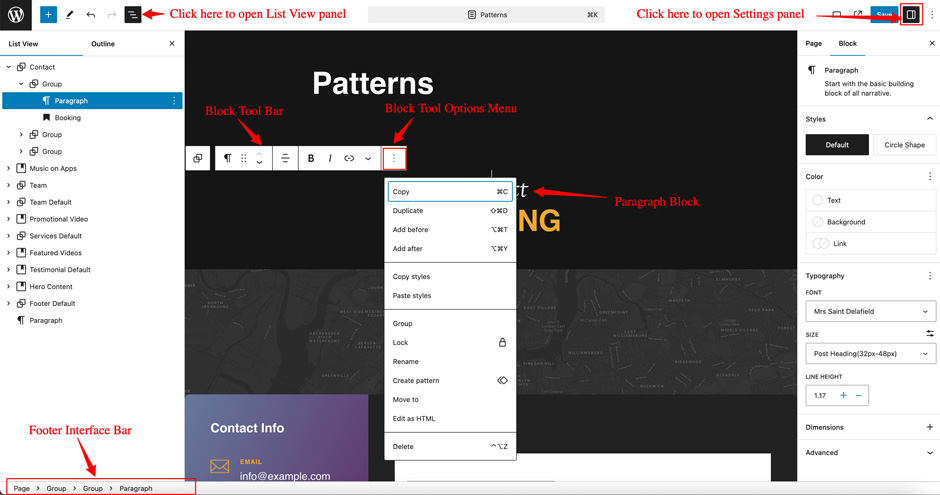
How to Edit Pattern Content?
First, click on the pattern content you wish to edit/customize
You can select the section/content in three ways
- Clicking on the section itself
- List View
- Footer Interface Bar
Once the section is selected you can edit its content or if you want to customize the section’ properties/options, click the three dots and select your desired action. Duplicate, Remove, Copy or Add desired section before or after the current section.
Patterns in Soundscape Pro
Patterns in Soundscape Pro are predefined list of in built sections. Patterns are built with different type of blocks.
You can easily add patterns in any part of your website. You will just have to click on ‘+’ sign on top left of your page or post, then you will see tab for “Pattern” click on that to see list of patterns. Under Scroll Down you will find “Euphony Blocks Pro” which will display list of our Euphony Blocks Pro pattern
Pattern are group of blocks. Once a pattern is added in editor, they are now individual blocks that can be moved edited or replaced. The pattern stops being pattern as soon as it placed in the editor. The content of patterns are always saved even if the users switches theme. It might look different in different themes.
There are 47 Patterns in Soundscape Pro.

Here is the list of Patterns Soundscape Pro supports including patterns from FSE Pro Plugin.
- List of posts – Archive
- Blog Section
- Contact Form With Info
- Contact Form
- Contact Info 3 Col
- FAQ
- Featured Category Slider
- Featured Category
- Featured Content Three Col
- Featured Content
- Featured Products
- Footer Widgets
- Footer
- Google Map
- Header Media
- Header With Cart
- Header
- Hero Content Full Width
- Hero Content
- Post meta
- Post navigation
- On Sale Products
- Our Identity
- Our Story
- Page About Us
- Page Contact Us
- Page Home Blogging
- Page Home Ecommerce
- Page Home
- Page Our Services
- Portfolio
- Post Header
- Products Carousel
- Promotional Headline
- Promotional Message
- Services
- Services With Thumbnail
- Sidebar
- Slider
- Stats
- Team Members
- Testimonial Slider With Background Image
- Testimonial Slider
- Testimonial
- Top Rated Products
- Woo Features
- Woo Sidebar
Header Patterns
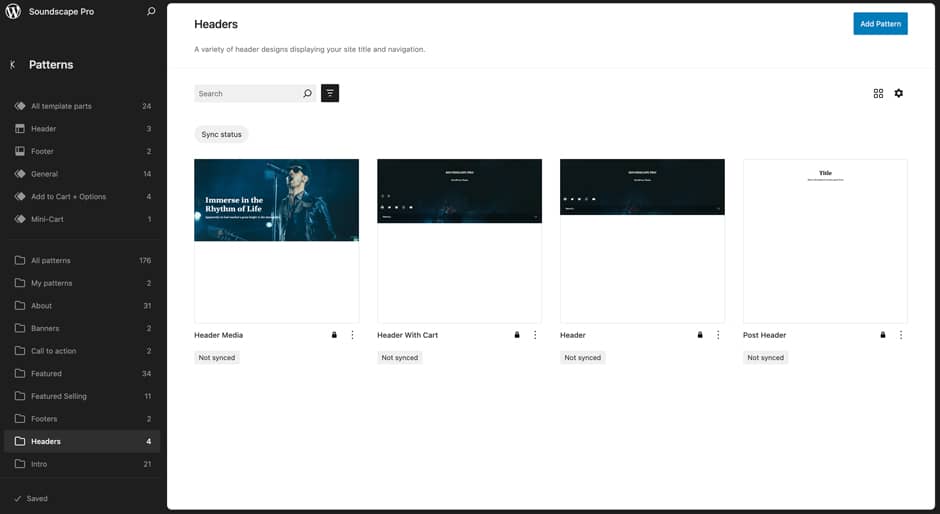
There are 4 different headers provided by Soundscape Pro. Here are the list of headers. You can choose header according to your need.
- Header Media
- Header With Cart
- Header
- Post Header
Here is how you add header to website:
- Click on “+” sign on block pattern tab to display Blocks and Pattern, Click on Pattern
- Click select “Soundscape Pro” to see list of pattern provided by Soundscape Pro
- Scroll down to find 10 different type of header(mentioned above) or type “Header” in Search box, click to add desired header or drag and drop
- After adding header, Click on Top left setting icon there you can edit the sections
- Edit Header Accordingly you can add, images, text, cover and so on
- Finally, click “Save” to save changes
Header Media
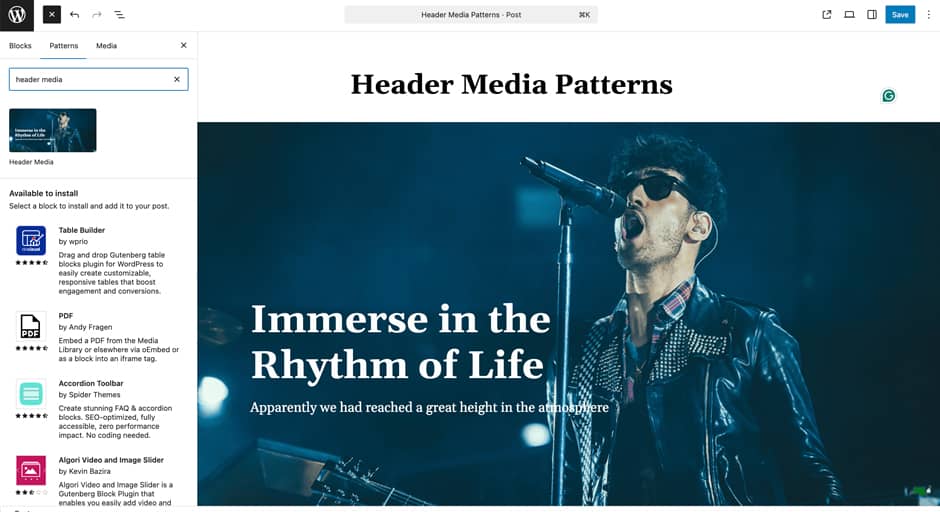
Soundscape Pro supports Header Media pattern, using this pattern you can add image in your header area along with featured image, button, header media text.
Here is how you edit header media:
- Click on “+” sign on block pattern tab to display Blocks and Pattern, Click on Pattern
- Click on dropdown menu and select “Soundscape Pro” to see list of pattern provided by Soundscape Pro
- Scroll down to find “Header Media” or type “Header Media” in Search box
- Click to add or drag and drop in desired area
- Click on the content of header media itself to replace images, text and button. You can add and replace header media such as image, text, link as per your need
- Finally click on Save to save changes
Slider

Soundscape Pro supports Slider pattern, this pattern allows you to display content on the slider. It’s just like a featured slider on the classic theme. By default it will load 2 slides which includes cover image, heading and paragraph.
Here is how you add Slider:
- Click on “+” sign on block pattern tab to display Blocks and Pattern, Click on Pattern
- Select “Soundscape Pro” to see list of pattern provided by Soundscape Pro
- Scroll down to find “Slider” or type “Slider” in Search box
- Click to add or drag and drop in desired area
- Edit Slides, you can add/replace cover image, heading, paragraph and so on. You can also add more slider to the slider.
- Finally click “Save”, to save changes
Promotional Message
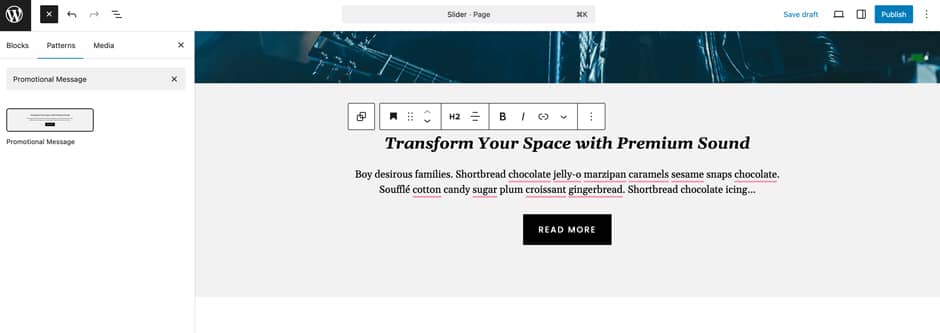
Soundscape Pro supports Promotional Message pattern, this pattern allows you to display the promotional content. By default it contains the heading, paragraph and button.
Here is how you add Promotional Message:
- Click on “+” sign on block pattern tab to display Blocks and Pattern, Click on Pattern
- Select “Soundscape Pro” to see list of pattern provided by Soundscape Pro
- Scroll down to find “Promotional Message” or type “Promotional Message” in Search box
- Click to add or drag and drop in desired area
- Edit Promotional Message Content accordingly. You can add/edit heading, paragraph, button and so on
- Finally click “Save”, to save changes
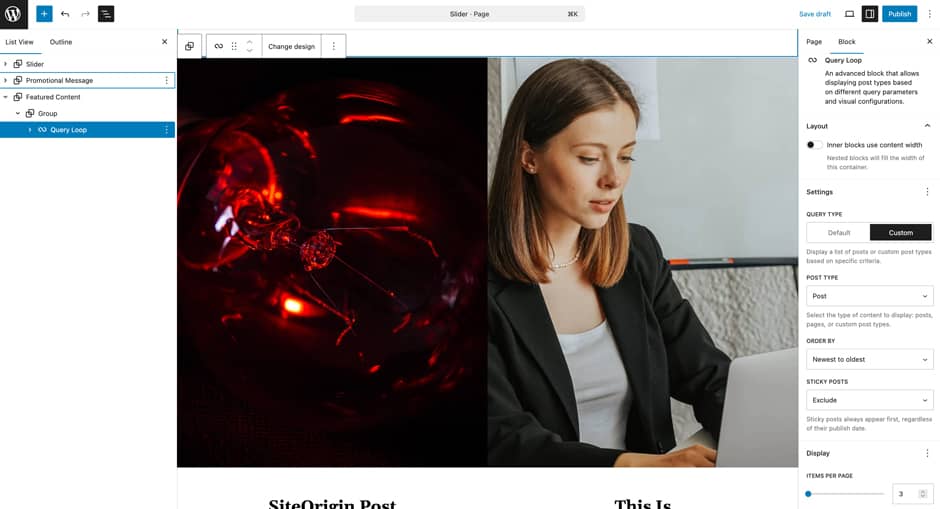
Featured Content
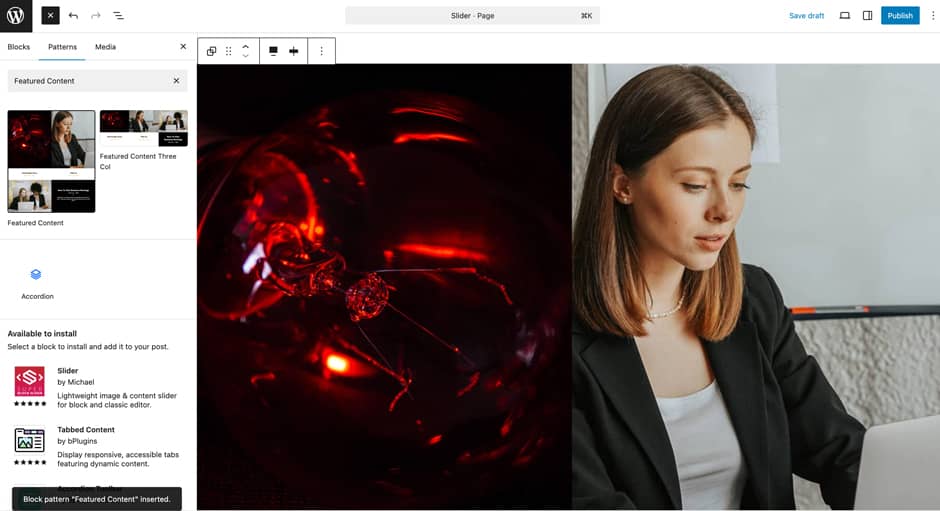
Soundscape Pro supports Featured Content patterns, this pattern allows you to display your Post Type (posts/page/prducts) with the help of Query Loop. It’s just like a featured content on the classic theme. By default it display 3 latest posts with the help of Query Look (Post type as “Post” and Items per page as “3”).
Here is how you add Featured Content:
- Click on “+” sign on block pattern tab to display Blocks and Pattern, Click on Pattern
- Select “Soundscape Pro” to see list of pattern provided by Soundscape Pro
- Scroll down to find “Featured Content” or type “Featured Content” in Search box
- Click to add or drag and drop in desired area
- Edit Featured Content, you can change the Post Type, Order By, Items Per Page and so on using the Query Loop block settings.
- Finally click “Save”, to save changes
Hero Content

Soundscape Pro supports Hero Content pattern, this pattern allows you to display the best assets of your website to your audience in the most amazing way possible. So, you can set the media and words side by side for a richer layout. Also, add the Image, Heading, Paragraph, and button for the section. Display your best assets and customize them the way you want.
Here is how you add Hero Content:
- Click on “+” sign on block pattern tab to display Blocks and Pattern, Click on Pattern
- Select “Soundscape Pro” to see list of pattern provided by Soundscape Pro
- Scroll down to find “Hero Content” or type “Hero Content” in Search box
- Click to add or drag and drop in desired area
- Edit Hero Content accordingly you can add/edit, images, text, cover, button and so on
- Finally click “Save”, to save changes
Promotional Headline
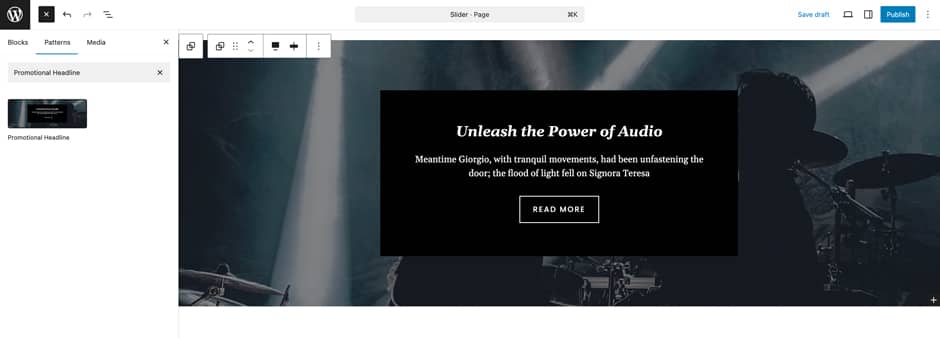
Soundscape Pro supports Promotional Headline pattern, this pattern allows you to display the promotional content. By default it contains the Cover image, heading, paragraph and button.
Here is how you add Promotional Headline:
- Click on “+” sign on block pattern tab to display Blocks and Pattern, Click on Pattern
- Select “Soundscape Pro” to see list of pattern provided by Soundscape Pro
- Scroll down to find “Promotional Headline” or type “Promotional Headline” in Search box
- Click to add or drag and drop in desired area
- Edit Promotional Message Content accordingly. You can add/edit Cover Image, heading, paragraph, button and so on
- Finally click “Save”, to save changes
Services
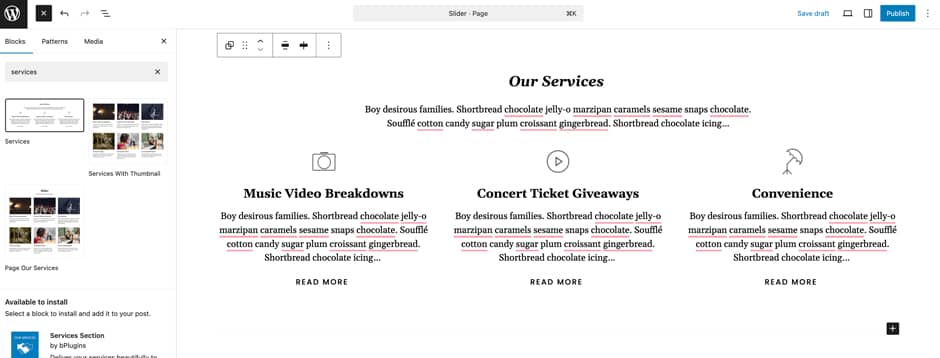
Services allows you to display your services. Soundscape Pro supports 2 Services patterns.
- Service
- Services With Thumbnail
Here is how you add Services Default:
- Click on “+” sign on block pattern tab to display Blocks and Pattern, Click on Pattern
- Select “Soundscape Pro” to see list of pattern provided by Soundscape Pro
- Scroll down to find “Services” or type “Services” in Search box
- Click to add or drag and drop in desired area
- Edit Services Accordingly you can add/edit, images, text, links, and so on
- Finally click “Save”, to save changes
Testimonial
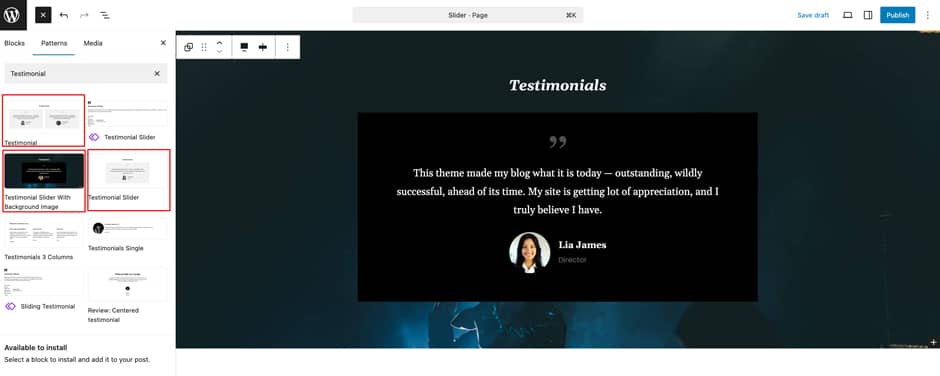
Testimonial allows you to display your customer testimonial. Soundscape Pro supports 3 Testimonial patterns.
- Testimonial Slider With Background Image
- Testimonial Slider
- Testimonial
Here is how you add Testimonial Slider With Background Image:
- Click on “+” sign on block pattern tab to display Blocks and Pattern, Click on Pattern
- Select “Soundscape Pro” to see list of pattern provided by Soundscape Pro
- Scroll down to find “Testimonial Slider With Background Image” or type “Testimonial Slider With Background Image” in Search box
- Click to add or drag and drop in desired area
- Edit Testimonial Accordingly you can add/edit, Testimonial Heading and Slider. By default it loads 3 slides which contains paragraph, images, title and paragraph.
- Your can increase or decrease the number of slides from Slider Settings, from “Settings” panel at top header right.
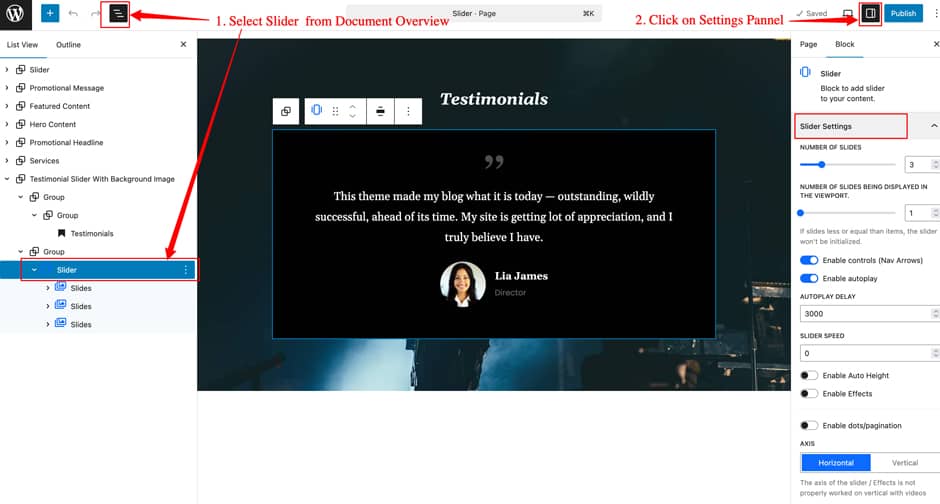
- Finally click “Save”, to save changes
Blog Section
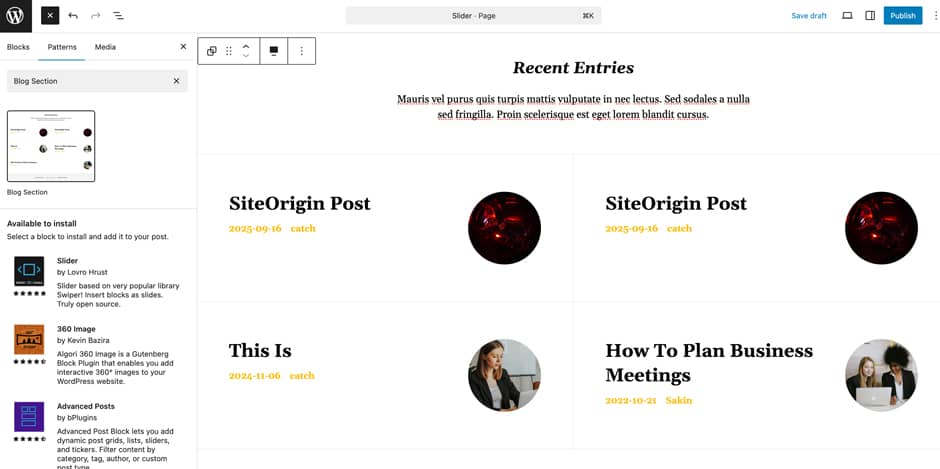
Soundscape Pro supports Blog Section patterns, this pattern allows you to display your Post Type (posts/page/prducts) with the help of Query Loop. By default it displays Heading, Paragraph and the 4 latest posts.
Here is how you add Blog Section
- Click on “+” sign on block pattern tab to display Blocks and Pattern, Click on Pattern
- Select “Soundscape Pro” to see list of pattern provided by Soundscape Pro
- Scroll down to find “Blog Section” or type “Blog Section” in Search box
- Click to add or drag and drop in desired area
- Edit Blog Section, you can change the Post Type, Order By, Items Per Page and so on using the Query Loop block settings.
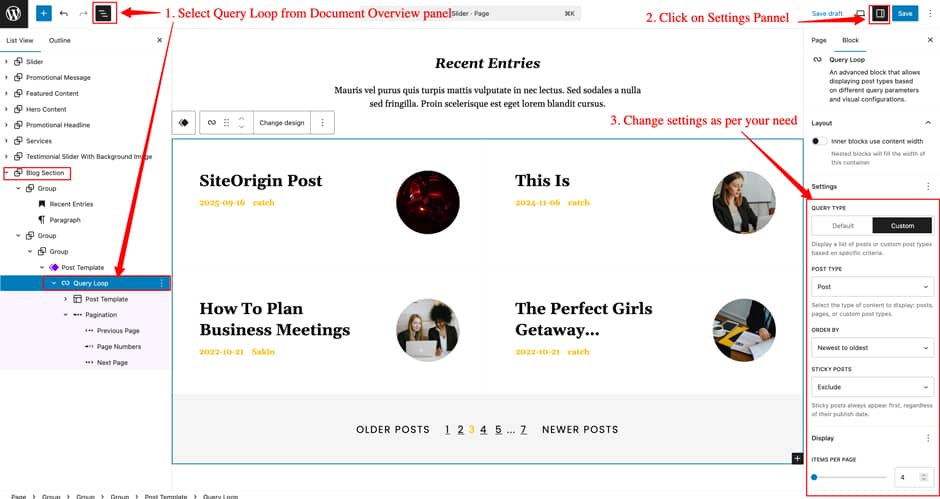
- Finally click “Save”, to save changes
WooCommerce Block Supported Patterns
Euphony Blocks Pro supports WooCommerce Blocks. You will have to install and activate WooCommerce Plugin to use these pattern. You can add Featured Products in these patterns.
Here are the patterns that supports WooCommerce Blocks:
- Featured Products
- On Sale Products
- Top Rated Products
- Woo Sidebar
- Cart Header
- Woo Features
How to to duplicate sections?
Duplicate section can be used if you want add similar section in your pattern.
For Example: If you want to add one more column in between your Featured Content Duplicate section can be used, as it will create similar section and you can edit the content accordingly.
Duplicate section is very easy step to add on particular sections in your pattern. It can be done in two ways via Clicking on content or Table of content (List View)
1. Step of Duplication By Clicking on content:
- Add the desired pattern, then click on the section you want to duplicate
- Click on the section you want to duplicate, after clicking tool bar will open and click the three buttons
- After clicking on the three dots menu on the tool bar, click on the “Duplicate” option to replicate your desired section or design
- Edit the section accordingly
- Click on “Save” button to save your changes
2. Steps of Duplication by using List View
- Add the desired pattern, then click on the section you want to duplicate
- Open the “List View” tab from top tool bar, to open the table of content
- Scroll down to the section that you want to duplicate
- Click on three dots menu and select “Duplicate” option to replicate your desired section or design
- Edit the section accordingly
- Click on “Save” button to save your changes
Templates in Soundscape Pro
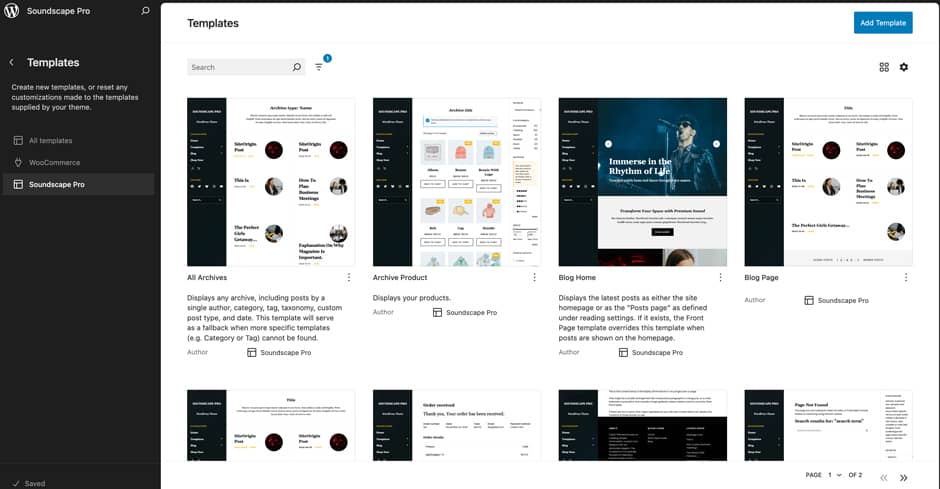
You can find 21 Templates provided by Soundscape Pro. You can customize these templates if you feel like changing anything on a certain template and wish to see those changes across your site.
- All Archives
- Archive Product
- Blog Home
- Blog Page
- Index
- Order Confirmation
- Page No Title
- Page: 404
- Page: Checkout
- Pages
- Product Search Results
- Search Results
- Single Page (No Sidebar Full Width)
- Single Page (No Sidebar)
- Single Post (No Sidebar Full Width)
- Single Post (No Sidebar)
- Single Posts
- Single Product
- Template Home
- Template Home(Blogging)
- Template Home(Ecommerce)
Editing Templates
- From your WordPress Dashboard, go to “Appearance => Editor”
- Click on “Templates => Soundscape Pro”, it will load all Templates
- Now, you can use the Search Bar to search for any above mentioned template or just scroll to view existing template
- After searching the template, click on it to load that template on Editor. Template consist of Template Part, Patterns and Blocks
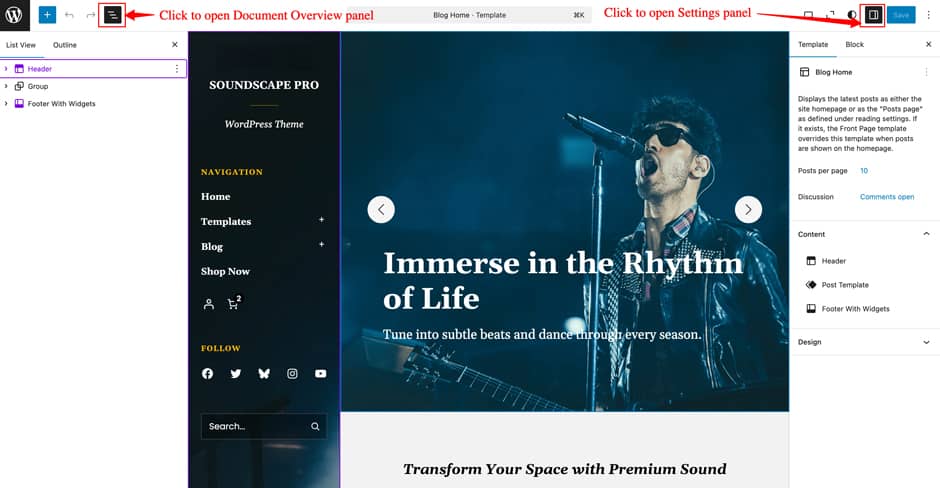
- If you want to see the List of Template Part, Patterns and Blocks used in the template, then click on “List View” panel. From this, you can click on the Element that you want to edit
- Now, you can edit the desire elements and after all the changes click on “Save” button
Template Home
Soundscape Pro Supports Template Home template, this template is used to display static Front Page.
- From your WordPress Dashboard, go to “Appearance => Editor”
- Click on “Templates”, it will load all Templates, then in Search Box type “Template Home”

- Click on “Front Page” template and will load the Front Page template
- If you want to see the List of Template Part, Patterns and Blocks used in the template, then click on “List View” panel. From this, you can click on the Element that you want to edit
- If you want to see the Settings of each blocks then you can click on “Settings” panel
- Now, you can edit the desire elements and after all the changes click on “Save” button
- Note: This template consist of Template parts like Header (with Banner”), Footer. So, if you edit block on those section then it will also update those template parts as well
Template Parts in Soundscape Pro
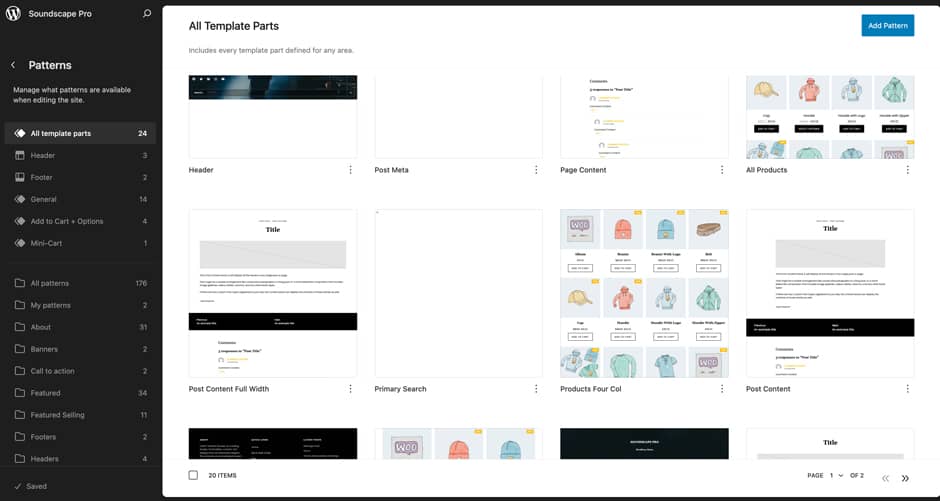
There are 17 Template Parts in Soundscape Pro.
- All Products
- Comments Post Page
- Footer With Widgets
- Footer
- Header With Cart
- Header
- Page Content Full Width
- Page Content
- Post Content Full Width
- Post Content
- Post Meta
- Post Template
- Primary Search
- Products Collection
- Products Four Col
- Sidebar
- Woo Sidebar
Soundscape supports WooCommerce Template Part. You will have to install and activate WooCommerce Plugin to use these WooCommerce Template Parts.
- Checkout Header
- Mini-Cart
- Simple Product Add To Cart + Options
- External Product Add To Cart + Options
- Variable Product Add To Cart + Options
- Grouped Product Add To Cart + Options
Editing Template Parts
- From your WordPress Dashboard, go to “Appearance => Editor”
- Click on “Patterns => All template parts”, it will load all Template Parts
- Now, you can use the Search Bar to search for any above mentioned template parts or just scroll to view existing template parts
- After searching the template parts, click on it to load that template parts on Editor. Template Parts consist of Patterns and Blocks
- If you want to see the List of Patterns and Blocks used in the template parts, then click on “List View” panel. From this, you can click on the Element that you want to edit
- Now, you can edit the desire elements and after all the changes click on “Save” button
Change Log
2.0 (Released: March 10, 2026)
- Added: Template Home Music
- Added: Template Home Solo Artist
- Added: Artist Single color styles
- Added: New Patterns for Music Demo
- Album & Singles
- Sticky Playlist
- Events tab
- Music on Apps
- Playlists
- Featured Album
- Logos
- Music On Apps
- Team Members Image Show On Hover
- Added: New Patterns for Solo Artist Demo
- Header Media Solo Artist
- Music Collection With Intro
- Events
- Added: New Patterns for E-commerce Demo
- Products Reviews
- Featured Category With Pattern Slider
- Updated: Service Pattern UI modification
- Updated: Header with Cart parts with user account text button
- Updated: Minor CSS
- Updated: Theme JSON file
- Updated: FSE Pro plugin version 2.1.3
1.0.1 (Released: December 20, 2025)
- Bug Fixed: Keyboard focus issue with sub-menu visibility
- Bug Fixed: Made text strings translation-ready and ensured links within content are underlined
- Updated: FSE Pro plugin version 2.1.2
- Updated: WordPress 6.9 ready
1.0 (Released: November 21, 2025)
- Initial Release
Satisfaction Guarantee
We make sure our customers are fully satisfied with our WordPress themes and meet their expectations. If you are not satisfied with your purchase, you are entitled to our 30-Day 100% Money Back Guarantee. No risks, Buy with Confidence!