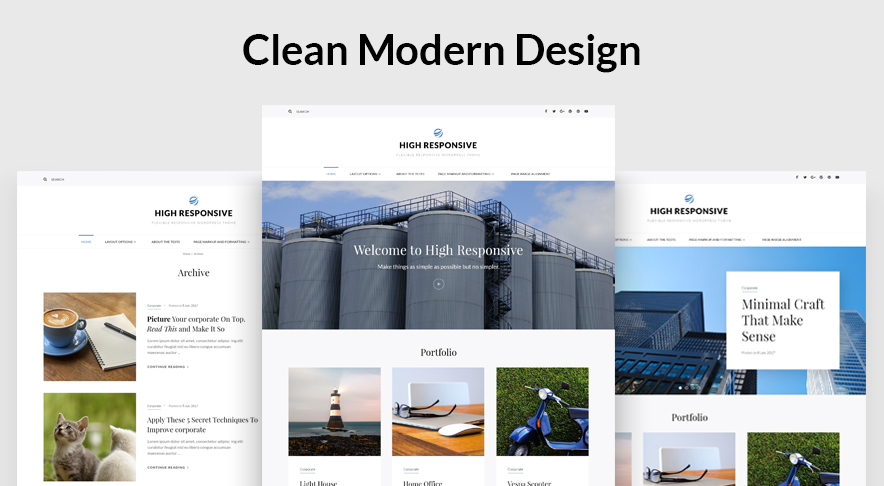
A multipurpose WordPress theme is a kind of theme that some users prefer to stay away from. They’re called the “jack of all trades, master of none”. Users having that kind of mindset assume that a theme that facilitates you with everything can possibly never be perfect or do any particular thing smoothly. Well, to cut out this baseless assumption we bring you High Responsive, our new multipurpose WordPress theme, that does all there is and still stands perfect.
High Responsive is a clean, multipurpose WordPress theme to create any type of website elegantly. Staying true to its name, High Responsive Pro is completely responsive and comes with features fit for promoting products and services, ability to create a professional portfolio, social media integration, eCommerce support and much more. It comes with basic features that are extremely crucial for any website, like header media options, custom menus, social icons, portfolio, testimonials, featured content, featured slider, hero content, and more to create an amazingly simple and elegant website in
no time.
Our new multipurpose WordPress theme, High Responsive is impressive, aesthetically pleasing and guarantees a superior browsing experience for your page visitors. High Responsive is an innovative, simple yet feature-rich theme that provides a flexible framework for any type of websites with a clean outlook. You can choose High Responsive for your blog, eCommerce, portfolio, or corporate website. High Responsive Pro gives you the perfect online niche that is dynamic, multifunctional and upfront.
Check out Support Forum at https://catchthemes.com/support-forum/forum/high-responsive-free/ and Demo at https://catchthemes.com/demo/high-responsive/
Please download and activate Essential Content Type Plugin to activate Portfolio and Testimonial feature on your site.
Features in “High Responsive Free Theme”
- Responsive Design
- Site Identity: Option to add/edit Custom Logo, enable/
disable Site Title and Tagline, and option to add Site Icon (FavIcon/Webclip Icon) - Colors: Option to change header text color and background color
- Header Media: Option to add Custom Header video or embed video from YouTube, enable/disable and reposition the Header video, display/hide Header Image, add Header Media Title, Header Media Text, Header Media URL and Header Media URL Text
- Menus: Option to use Primary Menu and Header Top Menu
- Breadcrumb Options: Option to enable/disable Breadcrumb
- Excerpt Options: Option to change Excerpt Length (words) and Read More Text
- Featured Slider: Option to enable Featured Slider on Homepage, Entire Site or Disable it
completely. Option to choose featured page slider only. - Additional CSS: Option to add your own CSS style to change the design as per your need
- Featured Content: Option to select Page as Featured Content further option to enable/disable content on Entire site and Homepage/Frontpage,
- Header Top Options : Option to enable/disable date, add email and add phone number .
- Hero Content Options: Option to enable/disable Hero Content in Homepage/Frontpage and
entire site. Select content type as Page. - Homepage/Frontpage Setting: Option to show post from selective category
- Layout Options:
- Site Layout: Option to choose either Fluid or Boxed layout
- Default Layout: Option to choose from:
- Right Sidebar (Content, Primary Sidebar)
- No Sidebar
- Homepage/Archive Layout: Option to choose from:
- Right Sidebar
- No Sidebar
- Archive Content Layout: Option to choose from
- Show Excerpt (Image left)
- Show Full Content (No Featured Image)
- Single Page/Post Image Layout: Option to choose various page/post Image layouts
- Disabled
- Enable (Post thumbnail)
- Pagination Options: Option to choose Pagination type from
- Default (Older Posts/Newer Posts)
- Numeric (Requires WP-PageNavi Plugin)
- Infinite Scroll (Click and Scroll: Requires Jetpack Plugin with Infinite Scroll module enabled)
- Scrollup Options: Option to enable/disable Scroll Up
- Search Options: Option to change text in search field.
- Portfolio :Option to enable/disable Portfolio in Homepage/Frontpage and entire site. (requires Essential Content Type Plugin ).
- Services: Option to enable/disable Services in Homepage/Frontpage and entire site. (requires Essential Content Type Plugin ).
- Testimonials : Option to enable/disable Testimonials in Homepage/Frontpage and entire site. (requires Essential Content Type Plugin )
- Reset all settings: Option to reset all the setting to default
- Widget Areas: 4 widgetized (Sidebar) areas, they are 1. Sidebar, 2. Footer One, 3. Footer Two, 4. Footer Three
- Content Types: To get content types you need Essential Content Type Plugin.
- Essential Content Type: You can get following option if you use Essential Content Type plugin
- Custom Content Type
- Portfolio
- Testimonials
- Services
- Featured Content
- Custom Content Type
Additional Features in “High Responsive Pro Theme”
- Colors: Option to choose Base Color Scheme as Default, Dark, Gray or Yellow and also choose Background Color, Page Background Color, Secondary Background Color, Link Color, Main and Secondary Text Color.
- Menus: Option to use Primary Menu, Header Right Menu, Header Top Menu, Footer Menu, Social Top Menu, Social Header Right Menu, Social Links On Primary Search Menu and Social Footer Menu
- Comment Options: Option to use WordPress setting for comments or disable it completely or in pages
- Featured Slider: Option to enable Featured Slider on Homepage, Entire Site or Disable it completely. Option to select featured slider from Post, Page, Category or Image.
- Featured Content: Option to select Post, Page, Category, Image, Tags(via jetpack) as Featured Content further option to enable/disable content on Entire site and Homepage/Frontpage, select featured content layout, edit Headline and Subheadline for Featured Content, select no. of featured content, Display Content, Display Meta, select multiple categories
- Font Family Options: Option to choose different fonts for Site title, tagline, Headings tags, Content title and Content body.
- Footer Editor Options: Option to edit footer left content and footer right content.
- Header Top Options :Option to disable header top. Option to enable/disable date, add email, add phone number and address.
- Hero Content Options: Option to enable/disable Hero Content in Homepage/Frontpage and entire site. Select content type as Post, Page, Category or Image. Option to display content as show excerpt, full content or hide content.
- Layout Options:
- Site Layout: Option to choose either Fluid or Boxed layout
- Default Layout: Option to choose from:
- Right Sidebar (Content, Primary Sidebar)
- LeftSidebar (Primary Sidebar, Content)
- No Sidebar
- No Sidebar (Full Width)
- Homepage/Archive Layout: Option to choose from:
- Right Sidebar
- Left Sidebar
- No Sidebar
- NoSidebar (Full Width)
- Archive Content Layout: Option to choose from
- Show Excerpt Image left
- Show Excerpt Image Right
- Show Excerpt Image Top
- Show Full Content ( Image Top )
- Show Full Content (No Featured Image)
- Single Page/Post Image Layout: Option to choose various page/post Image layouts
- Disabled
- Post Thumbnail
- Slider Image Size (1920×1080)
- Original Image Size
- WooCommerce Layout
- Right Sidebar (Content, Primary Sidebar)
- LeftSidebar (Primary Sidebar, Content)
- No Sidebar
- No Sidebar (Full Width)
- Portfolio :Option to enable/disable Portfolio in Homepage/Frontpage and entire site, layout options and option to choose content from Post, Page, Category, image and custom Post type (requires Essential Content Type Plugin ).
- Services: Option to enable/disable Services in Homepage/Frontpage and entire site. Select content type as Post, Page, Category, Image and Custom Post Type (requires Essential Content Type Plugin ).
- Testimonials : Option to enable/disable Testimonials in Homepage/Frontpage and entire site. Select content type as Post, Page, Category, Image and Custom Post Type (requires Essential Content Type Plugin ). Option to select layout for testimonials.
- Feed Redirect: Option to redirect your feed to feedburner
- Menu Options: Option to disable Primary Menu and enable search box in Primary Menu
- Update Notifier: Option to enable/disable update notifications
- WooCommerce Options: Option to enable/disable Zoom, Lightbox and Slider effects for WooCommerce Product Gallery
- Widget Areas: Additional 12 Widget areas which makes total of 16 widgetized (Sidebar) areas, they are1. Sidebar, 2. Footer One, 3. Footer Two, 4. Footer Three, 5. Footer Four, 6. Content Bottom 1, 7. Content Bottom 2, 8. WooCommerce Sidebar, 9. 404 Page Not Found Content, 10. Optional Homepage Sidebar, 11. Optional Archive Sidebar, 12. Optional Page Sidebar, 13. Optional Post Sidebar, 14. Optional Sidebar One, 15. Optional Sidebar Two and 16. Optional Sidebar Three
- Widgets: Total of 14 Widgets to choose from, they are: 1. CT:About, 2.CT:Advertisement Codes, 3. CT:Advertisement Images, 4.CT:Featured Embeds,5. CT:Featured Images, 6. CT:Featured Pages, 7. CT:Featured Posts, 8.CT:Gallery Images, 9. CT:Gallery Pages, 10. CT:Gallery Posts, 11.CT:Instagram, 12.CT:Newsletter, 13. CT: Social Icons and 14. CT: Tag Cloud
- WPML Ready : Supports WPML for Multilingual sites
Installation Using the WordPress Administration Panel #
You can download Themes directly to your blog by using the Add New Themes option in the Appearance sub-menu.
- Download High Responsive from Catch Themes site at https://catchthemes.com/themes/high-responsive/ to your Desktop
- Log in to the WordPress Administration Panel
- Go to “Appearance => Themes => Add New”
- Click on “Uploads” and Browse the downloaded file highresponsive.zip from the desktop where you have it downloaded
- Click on “Install Now” and then “Activate” to install the Theme
Manual Installation using FTP
To add a new Theme to your WordPress installation, follow these basic steps:
- Download High Responsive from Catch Themes site at https://catchthemes.com/themes/high-responsive/ to your Desktop
- Unzip highresponsive.zip to your Desktop
- Using an FTP client to access your host web server. Go to /wp-content/themes/ and make sure that you do not already have a highresponsive folder installed. If you do, then back it up and remove it from /wp-content/themes/ before uploading your copy of High Responsive
- Upload High Responsive to /wp-content/themes/
- Activate High Responsive through “Appearance => Themes”, in your WordPress Dashboard
Updating Theme Using the Administration Panel #
You can update Themes directly from the Administration Panel using Catch Updater plugin. Click here to read details about Catch Updater plugin.
Updating Theme Using FTP
To update Theme though FTP, follow these basic steps:
- Download High Responsive from your Catch Themes site at https://catchthemes.com/themes/high-responsive/ to your Desktop
- Unzip highresponsive.zip to your Desktop
- Using an FTP client to access your host web server, go to /wp-content/themes/ and upload your new copy of High Responsive Theme which shall replace the old files
Always Set Featured Images #
This theme relies heavily on Featured Images. If your post is missing a Featured Image, the post image will not show up on homepage, on archived pages and on Featured Page Slider. Click Here to see how to add Featured Image in your Post/Page.
Image Sizes:#
Custom Header
Width: 1920px
Height: 1080px
Post Thumbnail
Width: 1068px
Height: 567px
Slider Image:
Width: 1920px
Height: 1080px
Featured Archive Image:
Width: 666px
Height: 666px
Testimonial:
Width: 150px
Height: 150px
How to add Featured Image in Post/Page?
- Open the editor of the post/page where you want to display image, and locate the Featured Image module in the bottom right corner under Page Attributes. Click on Set Featured Image.
- Then you can either upload the image from your computer or select the existing image from your media library and click on Set Featured Image.Click to view screenshot
- For more detail, click here to watch video Screencast
Regenerate Thumbnails #
If you have just changed your theme then you need to regenerate image thumbnail for post published before activating this theme. You can simply install Regenerate Thumbnails Plugin. Then Regenerate Thumbnails through “Tools => Regen. Thumbnails” in your WordPress Dashboard.
Customizer (Theme Options) #
You can customize this theme using cool additional features through Customizer at “Appearance => Customize” from your WordPress Dashboard.
2) Header Setup#
How to add Logo? #
- Go to “Appearance => Customize => Site Identity
- You can replace the default logo by clicking on it or clicking on Change Image
- Then you can either upload the image from your computer or select the existing image from your media library
- Finally, click on “Save & Publish”
How to disable Site Title and Tagline? #
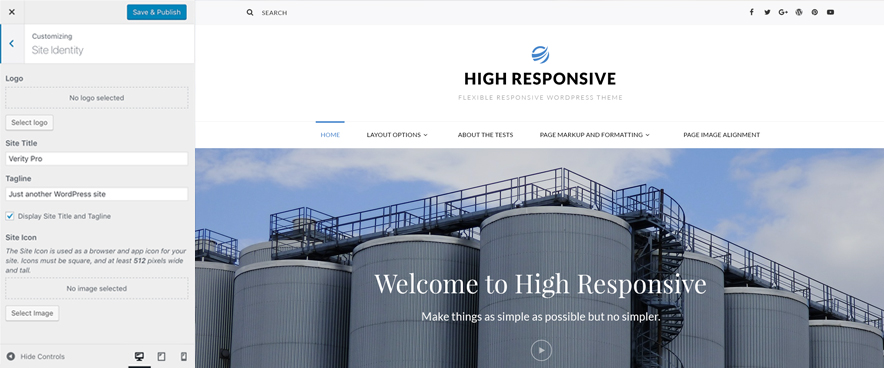
- Go to “Appearance => Customize => Site Identity
- Uncheck “Disable Site Title and Tagline” and it will not dispaly Site Title and Tagline
- Finally, click on “Save & Publish”
How to add Site Icon (Favicon/Web Clip Icon)? #
- Go to “Appearance => Customize => Site Identity => Site Icon”
- Click on “Select Image” and then you can either upload the image from your computer or select the existing image from your media library
- Finally, click on “Save & Publish”
How to add Header Video? #
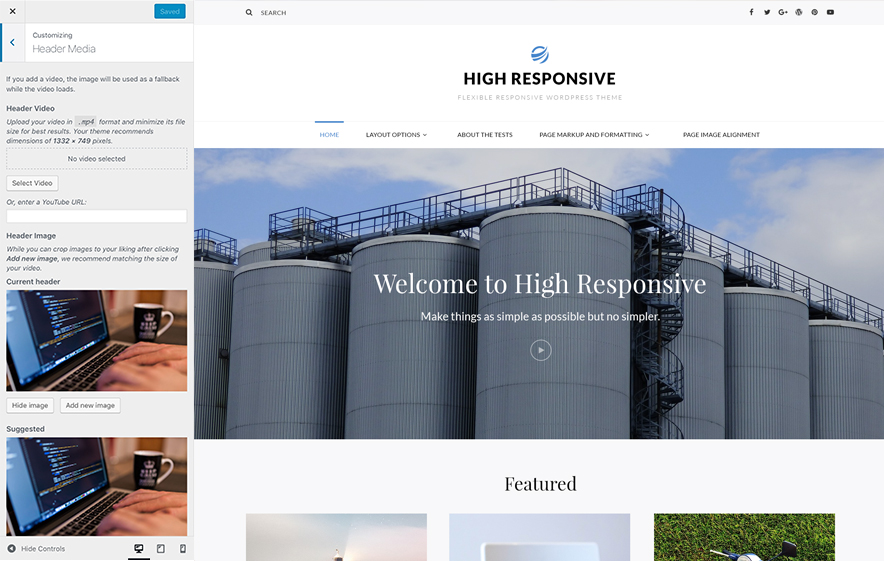
- Go to “Appearance => Customize => Header Media”
- To upload your video, click on “Select Video” option, then you can either upload the video from your computer or select the existing video from your media library, video must be less than 8mb
- To embed video from Youtube, you can enter YouTube URL
- Finally, click on “Save & Publish”
How to add Header Image? #
- Go to “Appearance => Customize => Header Media”
- To upload header image click on “Add New Image” or existing Header Image, then you can either upload the image from your computer or select the existing image from your media library
- Finally, click on “Save & Publish”
How to add/edit Header Media Text? #
- Go to “Appearance => Customize => Theme Options => Header Media Option”
- Under “Header Media Text” change the text
- Finally, click on “Save & Publish”
How to add/edit Date, Contact Number in top header? #
- Go to “Appearance => Customize => Theme Options => Header Top Options “
- Clik Disable date to disable date from appearing on your site.
- Add email and phone to display them on your site.
Color Option#
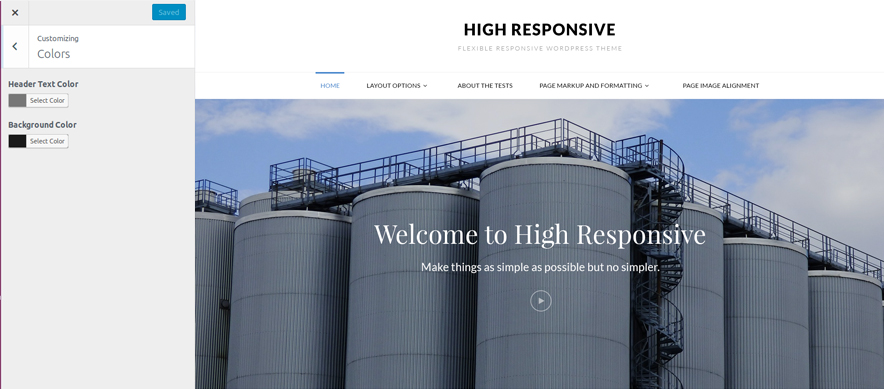
- Go to “Appearance => Customize => Colors”
- Under Header text color and Background color Select colors as desired
- Finally, click on “Save & Publish”
3) Menus #
High Responsive offers exciting Menu Options! This theme supports and recommends using “Custom Menus”. You can create Custom Menu through “Appearance => Menus” from your WordPress Dashboard.
Select Menu Locations
You can assign your custom menu in 2 different locations. You assign it either from “Appearance => Customize => Menus => Manage Location” or from “Appearance => Menus => Manage Location”
Select your Custom Menu as Primary Menu to display it as the Main Menu, which will replace the default Page Menu
Select your custom menu as Social Menu to display Menu in Header Top or inside Serach icon
4) Featured Slider #
High Responsive supports 1 featured slider type which is page featured slider. For Featured Slider Options, go to “Appearance => Customize => Theme Options =>Featured Slider”.
How to enable Featured Slider?#
- Go to “Appearance => Customize => Theme Options => Featured Slider” from your WordPress Dashboard
- To enable slider, select “Homepage/Frontpage or Entire Site” option under “Enable on”
- Under “No of Slides” Select the number of page sliders.
- Under “, Page # 1, Page # 2, Page # 3.”, Select the page which you would like to show as featured slider”
- Finally, click on “Save & Publish”
How to change Transition Effect, Transition Delay and Transition Length on Slider?#
- Make sure featured slider is enabled
- Go to “Appearance => Customize => Theme Options => Featured Slider” from your WordPress Dashboard
- To change Transition Effect, select option under “Transition Effect”
- To change Transition Delay, change number of second(s) under “Transition Delay” as per your need
- To change Transition Length, change number of second(s) under “Transition Length” as per your need
- Finally, click on “Save & Publish”
Image Loader#
- Go to “Appearance => Customize => Theme Options => Featured Slider” from your WordPress Dashboard
- Under “Image Loader”, select “True, False or Wait” as per your need
- Finally, click on “Save & Publish”
Note:
True: Fixes the height overlap issue. Slideshow will start as soon as two slider are available. Slide may display in random, as image is fetch.
Wait: Fixes the height overlap issue. Slideshow will start only after all images are available.
How to change number of slides in featured slider?#
- Make sure featured slider is enabled
- Go to “Appearance => Customize => Theme Options => Featured Slider” from your WordPress Dashboard
- Under “No of Slides”, select the number slides as per your need
- Finally, click on “Save & Publish”
Note: To see changes in No of Slides please refresh the customizer page.
5) Featured Content #
High Responsive supports 1 featured content types which is page featured content. For Featured Content Options, go to “Appearance => Customize => Theme Options => Featured Content”.
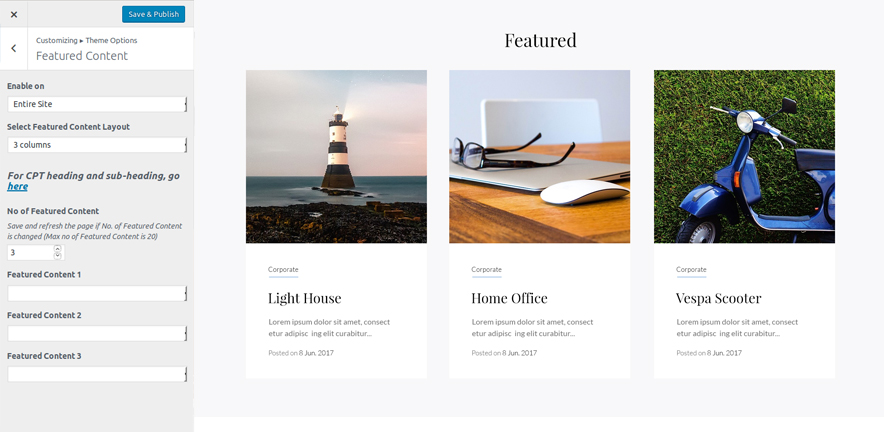
How to enable Featured Content?#
- Go to “Appearance => Customize => Theme Options => Featured Content” from your WordPress Dashboard
- To enable featured content, select “Homepage/Frontpage or Entire Site” option under “Enable on”
- Under “No of Featured Content” Select the number of Featured Content you would like to display.
- Under “, Featured page 1, Featured Page 2, and so on”, Select the page which you would like to show as featured Content”
- Finally, click on “Save & Publish”
Hero Content #
High Responsive supports 1 Hero Content types to choose from that is from page. For Hero Content Options, go to “Appearance => Customize => Theme Options => Hero Content Options”.
How to enable Hero Content? #
- Go to Appearance => Customize => Theme Options => Hero Content Options
- To enable Hero Content, select option Entire Site or Homepage/Frontpage under “Enable Hero Content on”
- Under “Page”, Select the page to show as hero content on your site
- Finally, click on “Save & Publish”
Content Types
If you want content type option in your theme you can either use Jepack or our free plugin Essential Content Type. The details are listed below:
Frontpage Elements
Essential Content Type #
You can install our free plugin Essential Content Type from this link and follow the steps provided by the link.
How to add Portfolio in Homepage/Frontpage using Essential Content Type?#
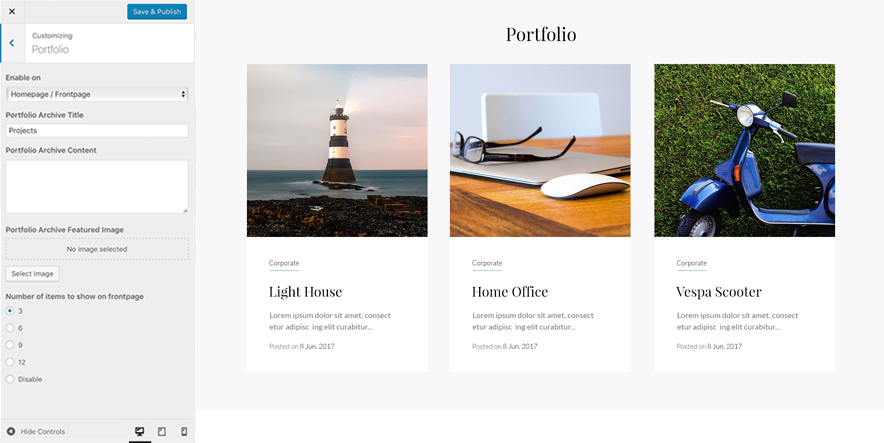
Follow these steps to showcase projects on your site:
- First you need to install Essential Content Type
- After that you can find Essential Content Type option in your WordPress Dashboard
- Click on “Essential Content Type”, there you can see “Portfolio/Projects” option then you need to on the button of Portfolio/Projects option(This option is enabled by default)
- Then go to “Customize => Portfolio” and choose number of items to show in frontpage
- Finally, click on “Save & Publish”
Note: To edit Portfolio Archive Title, Acrhive Content and Archive Featured Image, go to Customize => Portfolio”
How to add Testimonials in Homepage/Frontpage using Essential Content Type?#
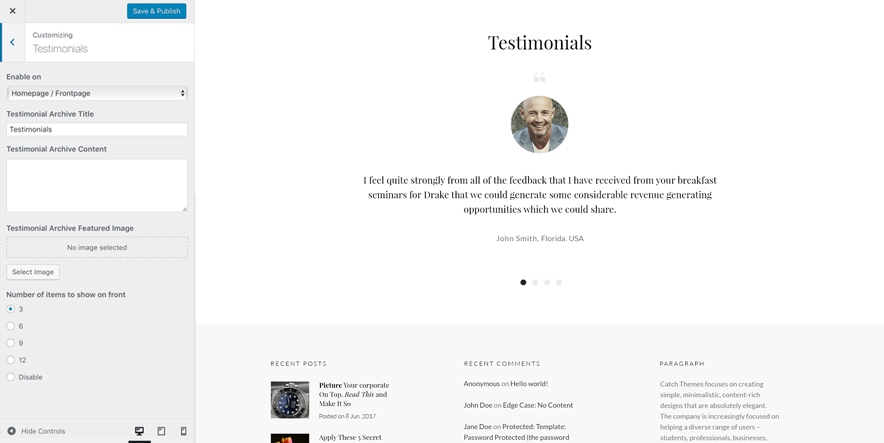
Follow these steps to showcase projects on your site:
- First you need to install Essential Content Type
- After that you can find Essential Content Type option in your WordPress Dashboard
- Click on “Essential Content Type”, there you can see “Testimonial” option then you need to on the button of Testimonials option(This option is enabled by default)
- Then go to “Customize => Testimonial” and choose number of items to show in frontpage
- Finally, click on “Save & Publish”
Note: You can further edit Portfolio Archive Title, Acrhive Content and Archive Featured Image, go to Customize => Portfolio”
How to add Featured Content in Homepage/Frontpage?#
Follow these steps to add, organize and display Featured Content:
- First you need to install Essential Content Type
- After that you can find Essential Content Type option in your WordPress Dashboard
- Click on “Essential Content Type”, there you can see “Featured Content” option then you need to on the button of Testimonials option(This option is enabled by default)
- Then go to “Customize => Featured Content” and edit Featured Content Archive Title, Featured Content Archive Content and Featured Content Archive Featured Image as per your need/li>
- Finally, click on “Save & Publish”
Services #
Follow these steps to showcase the services that you provide.
- First Go to Appearance => Customize => Theme Options => Service
- Under Enable on : you can select Homepage / Frontpage, entire site or completely disable it.
- Under Main Image: Select the image as desired.
- Under Main Image Link: Input the Link for the image.
- Under Select Service Layout: Select the number of columns for the layout of services.
- Under Service Archive Title: Provide the name for the service.
- Under Service Archive Content : Additional details about the service.
- Under “Service 1, Service 2 ….. ” Select the service that you would like to display.
- Finally, click on “Save & Publish”
Widget Area (Sidebar)#
High Responsive currently has 4 widgetized (Sidebar) areas there are: 1. Sidebar, 2. Footer Area One, 3. Footer Area Two, 4. Footer Area Three Go to “Appearance => Widgets” or “Appearance => Customize => Widgets” in WordPress.
How to add Widgets in widget area? #
You can add widgets to your widget area from two location
1. Go to “Appearance => Widget”, then drag the widget to the widget area or you can click in the widget then list of widget area will appear, now you can choose desired widget area and click on “Add Widget”.
2. Go to “Appearance => Customize => Widgets”, then you can find list of widget area. Click on the any widget area and you will see “Add a Widget” option by click on it you can find list of Widget which you can add to respected widget area.
Layout Options #
High Responsive has 2 Site Layout, to choose from “Appearance => Customize => Theme Options => Layout Options”
Site Layout
Once you are in Layout Options, you can Check the option below “Site Layout” which will set your site layout.
How to Change the Excerpt Length and continue reading Text? #
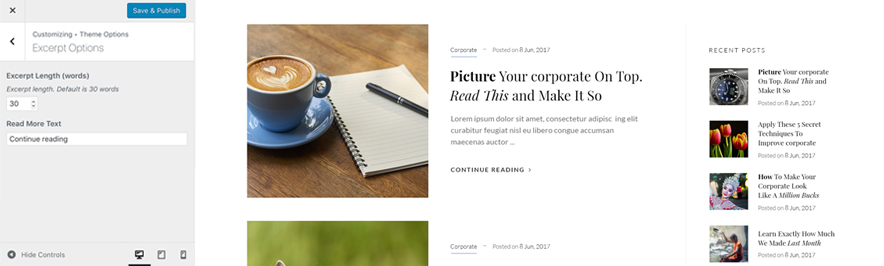
- Go to “Appearance => Customize => Theme Options => Excerpt Options”
- Type in the Excerpt Length as in, the number of words, and Continue reading Text
- Finally, click on “Save & Publish”
How to Set Certain Categories to Display in Homepage/Frontpage? #
- Go to “Appearance => Customize => Theme Options => Homepage/Frontpage Options”
- Then select the category you want, and you may select multiple categories by holding down the CTRL key(windows)/Command Key(Mac)
- Finally, click on “Save & Publish”
How to change Pagination Options? #
- Go to “Appearance => Customize => Theme Options => Pagination Options”
- Under Pagination Type, select desired option
- Finally, click on “Save & Publish”
How to enable/disable Scrollup feature? #
- Go to “Appearance => Customize => Theme Options => Scrollup Options”
- Check option “Check to disable Scroll Up”
- Finally, click on “Save & Publish”
Additional CSS #
You can add your custom CSS that will overwrite the theme CSS for further design customization through “Appearance => Customize => Additional CSS”, in your WordPress Dashboard.
Note: If you are doing heavy customization and adding lot of custom css then we recommended to build Child Theme and add it in your child theme style.css file. Read More about child theme…