Some of our theme supports Page, Post and Category as Gallery. To add galley you need to add our free plugin catch gallery
A. How to add Gallery on the Page/Post using Catch Gallery?
You can create your own gallery on the Page or on the Post as per your requirement. Install and activate Catch Gallery Plugin
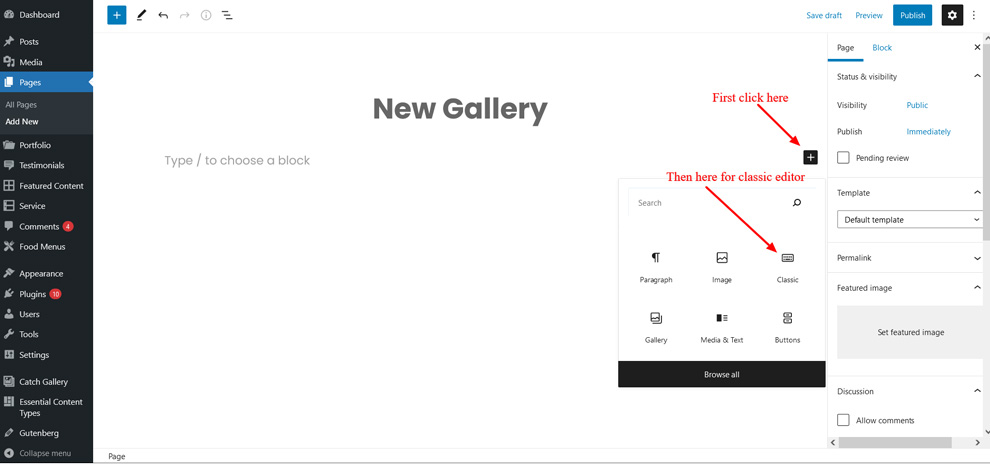
- Open the page/post where you want to create Gallery, click on Plus Icon
 and “Classic” to add the classic block.
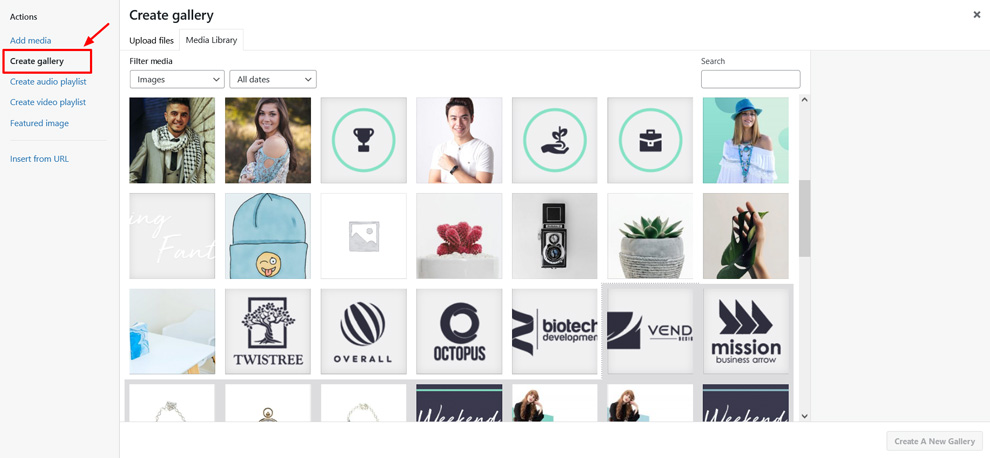
- Click on “Add Media” Icon
 .
.

- Click on the “Create Gallery” button (on your left) and if you need to upload new images then you can do it here from the “Upload Files” tab or if you want to use existing images in your site then you can select it from “Media Library” tab

- After selecting images for the Gallery, you need to click on the “Create a new gallery” button (on bottom left)
- Further option to change image galleries in three four styles: thumbnail grid, a tiled mosaic, a square tiled, and a circular grid

- Finally, click on the “Insert gallery” button, publish or update your page/post.

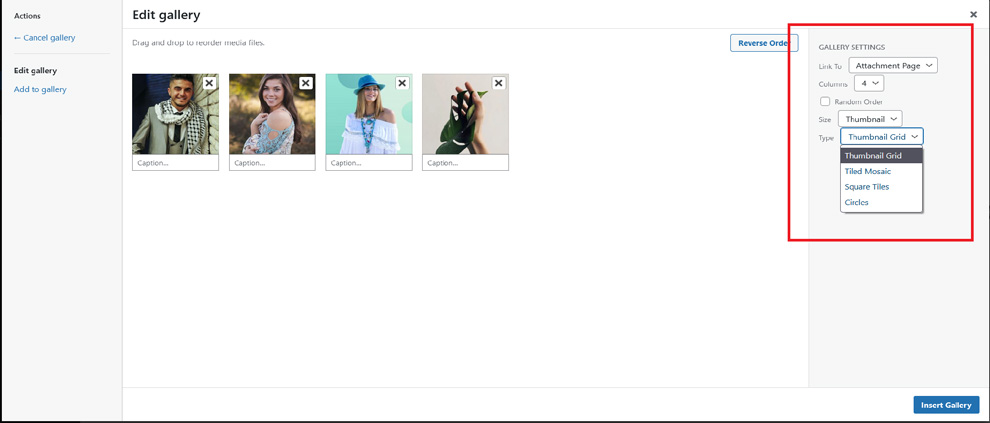
Note: If you choose the Type as “Tiled Mosaic” then your “Columns” settings will not work as well as you need to select “Size” as “Large” or “Full” as if the image size you selected is small then it will show gallery as distorted.
B. How to add Gallery Section on your site?
- Go to “Appearance => Customize => Theme Options => Gallery”
- Make sure that you have installed and activated Catch Gallery Plugin
- To enable gallery select the option under “Enable on”, then select type as Page, Post or Category as per your need
- If you select type as “Page” then choose the page you want to display as gallery
- If you select type as “Post” then choose the post you want to display as gallery
- If you select type as “Category” then select the categories you want to display as gallery
- Finally, click on “Save & Publish”