

These days many bloggers and professionals new to web technicalities, prefer WordPress. Probably its clean interface is what makes it popular. For a regular user, not much accustomed with complex web jargons, WordPress websites certainly look way less daunting than most of other customized websites based on complicated programming languages. More and more people are taking to the idea of putting together their own websites, completely owning their pool of data and content. Since WordPress tutorials and instructions are simple enough for most to understand, today it has become very much possible for users to create websites that look clean, nice and adequately reflect our ideas or line of work.
A lot of confusion hovers amongst users, about creating WordPress Menus. However, with every next version, WordPress interface is getting increasingly user-friendly. Likewise, WordPress 3.6 has made the backend interface of Menus, much more organized and thus easy to use.
A good many themes offer the option of custom menus from where you can create and manage your own menus. Does your theme template support multiple menus and the facility of assigning those to multiple locations? Choose fantastic WordPress Theme by Catch Themes, at a ridiculously reasonable price, which offers these options. So now we’ll see how setting up the Menu, works in this one.
Create Custom Menus
Go to “Appearance => Menus”. The process has been divided under two tabs, “Edit Menus” and “Manage Locations”.

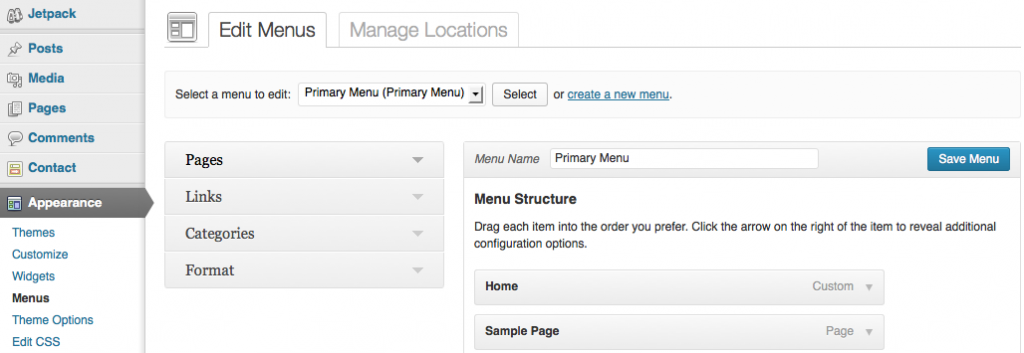
Create Custom Menus
On top there is the option to “Select a menu to edit” or “create a new menu”. Ofcourse, you need to “create” before you “edit”. What you need to know is you can create as many “Sets” of Menus as you wish and alternately display them or display at least 3 “Sets” at a go, in 3 different locations, namely, Primary, Secondary and Footer Menus. You do this through “Theme Locations” at the bottom right of the “Edit Menus” tab, or through “Manage Locations” next to the “Edit Menus” tab.
To the right hand side, above the “Menu Structure”, you have a box where you can type in “Menu Name” and “Save Menu”. When you do this, you categorize a “Set” of Menu for your WordPress Site. To the left you can see, Pages, Posts, Links, Categories. Any of those can go into your Menu items. All you need to do is select them and they appear under “Menu Structure” to your right. With Links, you type in the URL, and in “Link Text” you type in a name (any name) that you would like to appear on the Menu (and lead to the link). Under “Menu Structure”, you have the flexibility to drag, drop and arrange items on top of each other, exactly in the order that you personally prefer.
You can tick the box that says “Automatically add new top-level pages to this menu” for any new “Set” you create, if that is convenient for your purpose. The option is available.
Usually, people use the same “Set” of items for the Primary and Footer Menus. This way, even if the page is long, when you scroll to the bottom, you can still change pages from the Footer without having to scroll all the way up. However, you can choose a completely different Menu “Set” for the Footer too if you wish. Secondary Menu is located right under the Primary Menu and you can have another different “Set” displaying here, as according to your need.
Custom Menus used in Catch Box Pro WordPress Theme

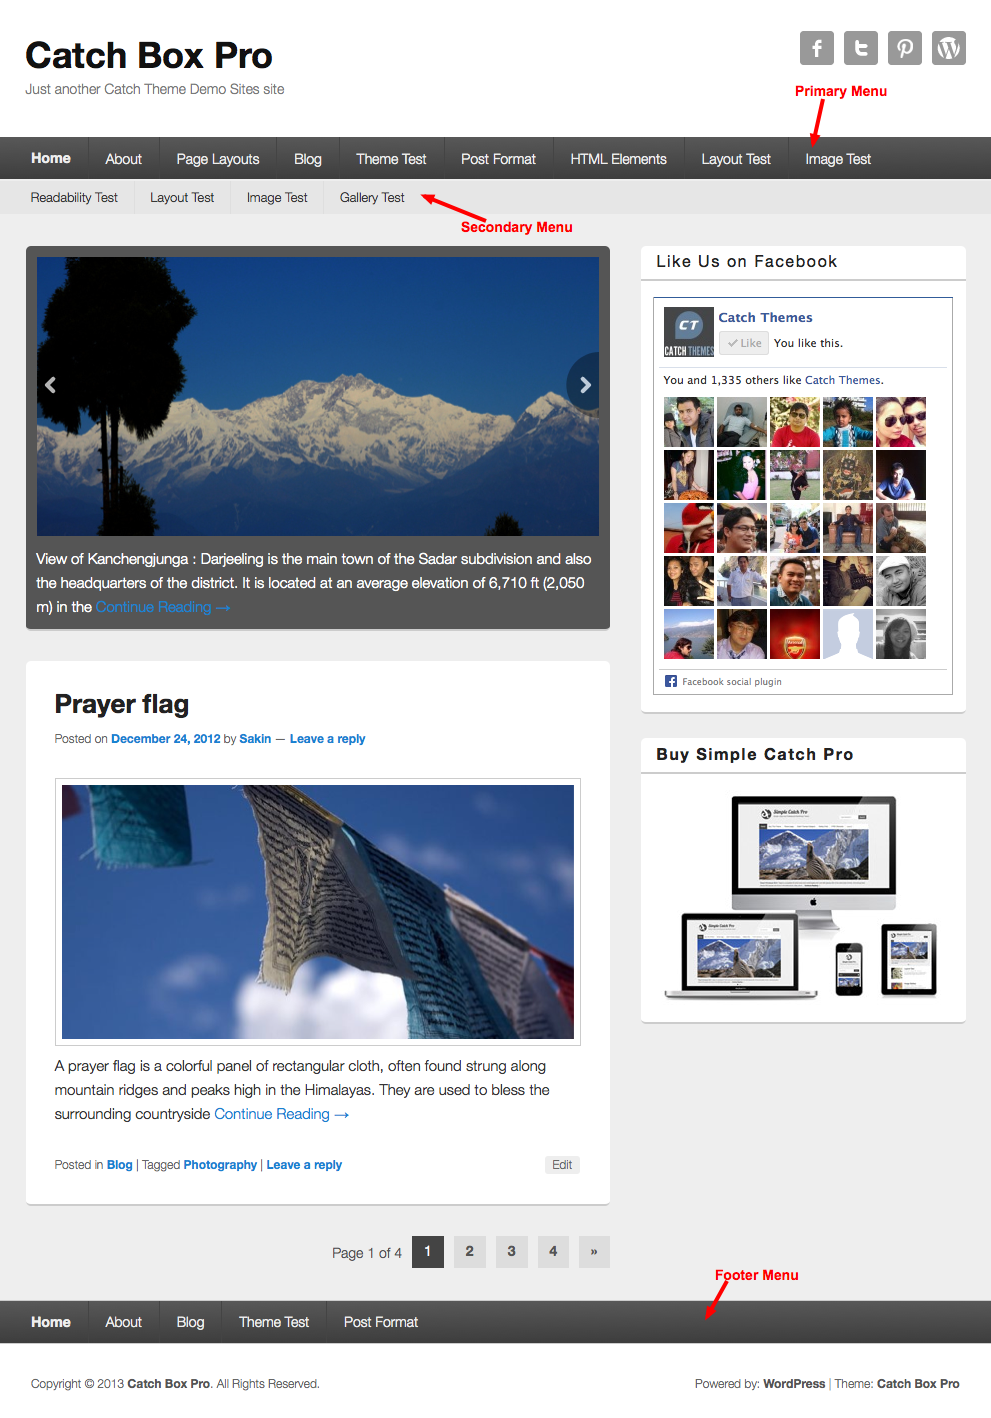
Catch Box Pro Theme uses Primary, Secondary & Footer Menus
One more thing that would perhaps interest you. There is the option of creating Child Menu under the Parent Menu for any “Set” you create. How? Just go to “Appearance => Menus => Edit Menus => Menu Structure”. Under “Menu Structure”, you will have your selected “items” that make a particular “Set” of Menu. You can drag an item below, a little to the right of the one above it. This is how you create a “Parent” and a “Child” Menu. This applies for all three, Primary, Secondary or Footer locations.
Hopefully, all this helps you to play around with your WordPress Menu options much better. More later!
